Pages

Showing posts with label Origami. Show all posts
Friday, January 26, 2018

Origami Triangular Prism


Origami prism 

one of the most greatest reward you get when creating origami models is that it further your development in the wold of origami and also creates opportunity to produce individuality. Unlike the other origami building a triangular prism involves cutting.  "there are already so many possible ways to fold most models and no cuts, that when you lose these restriction you lose a sense of direction"(Shaffer 18). when making origami many people always go back to the rules and guidelines and refuse to cut cause they refer to that as a cheat and cheap way to make origami when in all actuality it just expands your creativity and sense of setting new guidelines.


"A triangular prism is a prism composed of two triangular bases and three rectangular sides." (Shaffer 23) When creating the triangular prism it is important you follow the whole product based off the bases and sides because of the alternate sides on the origami.


do you think cutting in origami is ethical?

Shaffer, Jeremy. “Origami to Astonish and Amuse.” Amazon.com, 6 July 2001, www.amazon.com/Origami-Astonish-Amuse-Jeremy-Shaffer

Basic Origami

Basic Origami

Not ever origami piece you create should be complex and contains hundreds of folds, sometimes it just important to keep it simple. When you first hear about what basic origami is, you find that most people think of the crane. But even though it may be the first one you hear about, it is not actually a basic model, there are some much easier models that are better to start with if you're a beginner. "all origami basic origami can be broken down into mountains folds and valley folds. Mountain folds indicated dot-dot-dot dash lines, are convex like a mountain ridge"(Shaffer 32). vertical (mountain folds) and horizontal lines (valley folds) are much easy to complete in origami. Folding opposite sides from each other help build a greater product. 


"there are enough fabulous origami models out in the world, already exquisitely designed and diagrammed to keep a fanatic folder occupied for years" (Shaffer 14). No, i'm not saying that you should limit your creativity ability, i'm simply saying that origami doesn't always have to consist of hardship and precise placement. Much like the origami cat at i'm doing for this blog. the origami cat is simply basic but still has value. 


whats your favorite basic origami?  

Shaffer, Jeremy. “Origami to Astonish and Amuse.” Amazon.com, 6 July 2001, www.amazon.com/Origami-Astonish-Amuse-Jeremy-Shaffer
Wednesday, January 24, 2018

Roaring Fire: Origami Airplane

I wanted to finish off with a bang for my last paper airplane and what a better way to do it, is to make the "Roaring Fire." When I first saw the design, it looked insanely cool. The skill rating was between the medium and hard side but I knew I had to try it for myself. The description bought me in. "This airplane will light up the sky with its roaring fire. The flames will seem to glide behind the model as they flare across its wings. The large wing area, made by first folding the paper across its width, helps this airplane stay aloft. A powerful launch lifting it high into the air will see it blaze a trail across the sky" (Ono 60). Well, it's time for me to finish this.


Doing it a little differently from other blogs, I am showing the final design before the steps to show you how I got it from just sheet of paper to this.


The Paper Design:
From what I could already tell, the paper was different than the others. It was wider and it looked like it was going to be less complicated than I thought.


Second Step:
"Next turn the tip back so that it sits on the far edge of the paper" (Ono 60).
The first step was the "basic fold both corners onto the middle" so transitioning to the second the step, I had to fold the tip on the edge of the paper.


Third Step:
"Fold the tip back so that the new crease lies half between the new edge and the original flaps" (Ono 60).
When doing this, I made sure to use ruler so I knew if I was lying the new crease in the middle of the original flap. It helped a lot.
After the third step, I flipped the paper over and folded it in half, leading it up to the fifth and final step!


Final Step:
"Place a ruler against the object to make a crisp, angled fold for the wing, starting at the end tips of the plane. Turn over and repeat on the other side to finish" (Ono 60).
The ruler part was super helpful. I would recommend to use it as tool for other paper airplanes to build in the future.


Question:
Have you ever tried something you thought you would never do but end up liking it?


Ono, Mari, and Roshin Ono. Fly Origami Fly. Edited by Robin Gurdon, illustrated by Trina Dalziel, Cico Books, 2010.


Wednesday, January 17, 2018

Stealth Jet

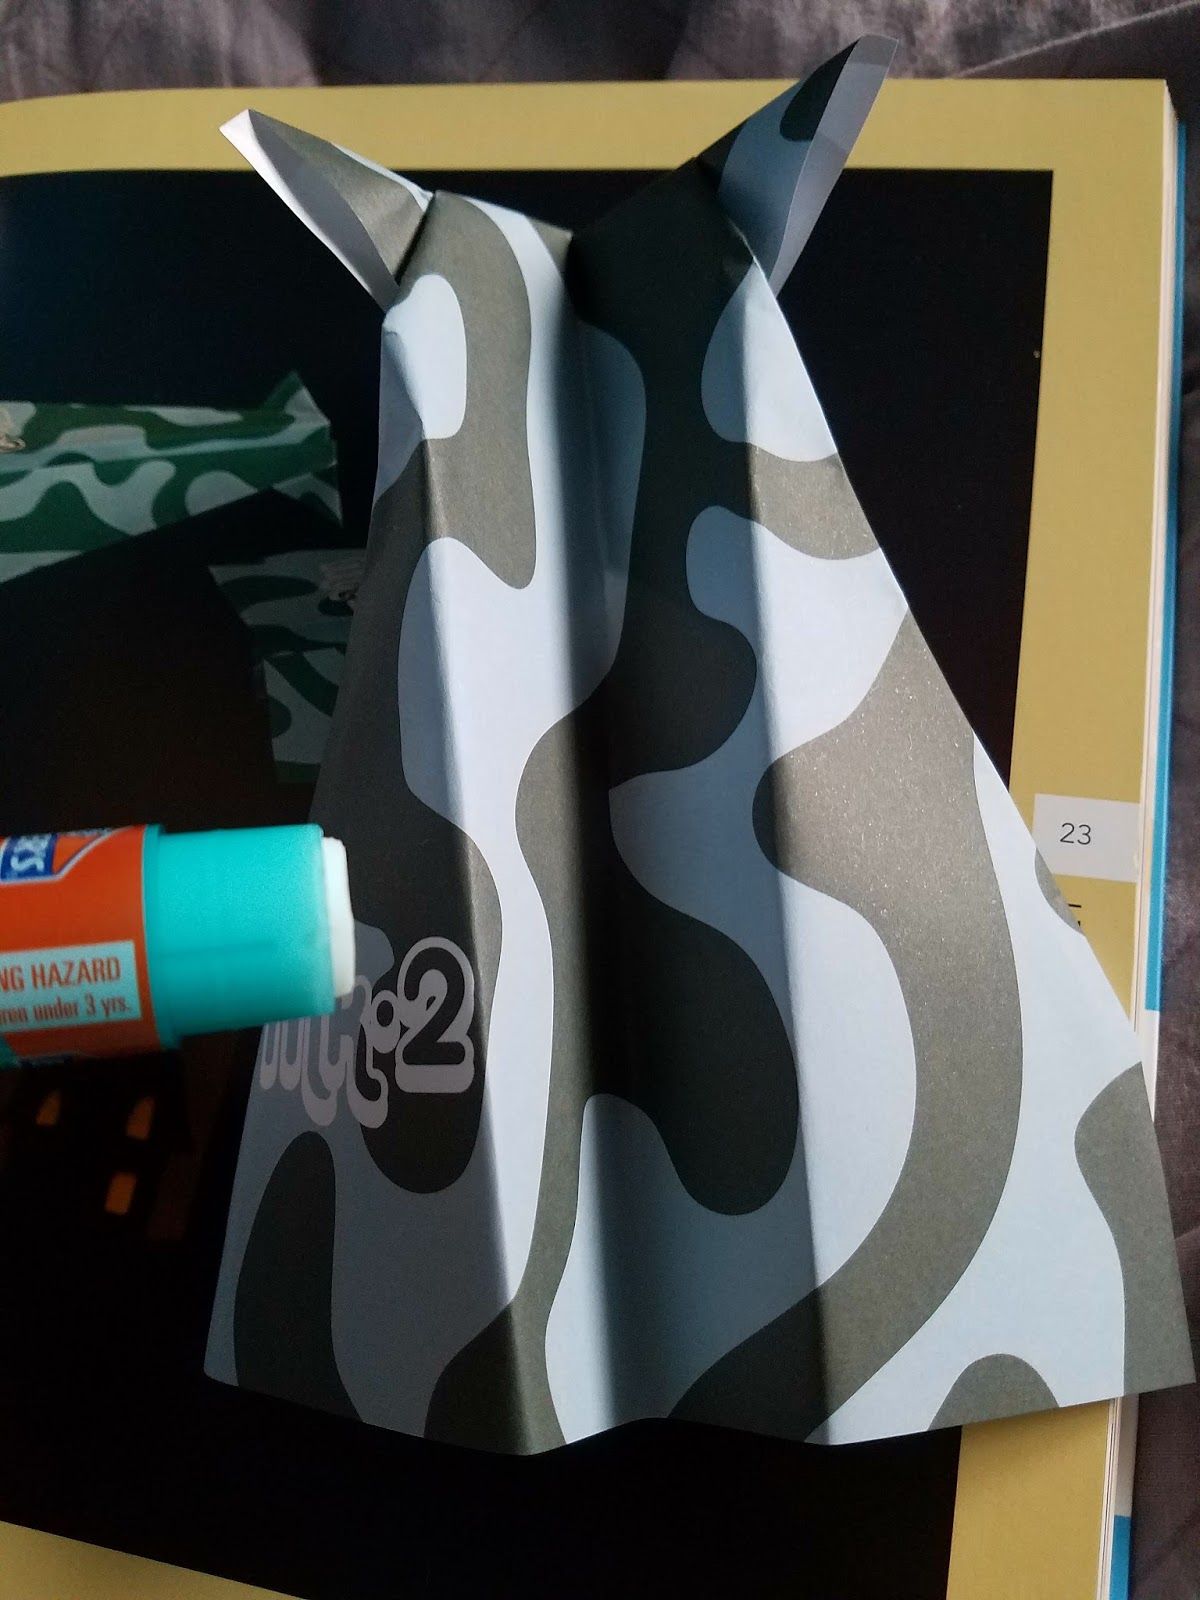
Building my first paper airplane in the book gained me confidence to try one in the harder skill level. it was called the "Stealth Jet." As I was flipping through the pages, it quickly caught my eyes. It looked unique with the front side pointing out like two horn. I couldn't miss the opportunity. The description said, "This jet is a classic and has been made by paper plane enthusiasts for generations. it is known as the '"Squid Airplane"' in Japan because its shape looks like a sea squid!" (Ono 22). Of course, I thought it looked like horns but after reading the description it looks more like squid than anything else. But anyways, this was my attempt for the "Stealth Jet."


The Paper Design:
The paper was about 8x6/21x15 cm. The color combination between dark green and light blue was nice, one of the reasons why I chose this plane.


First Step:
"Make a crease along the center of the paper by folding the colored sides together. Open out the sheet and fold two corners to meet along the central crease" (Ono 22).
From my experience on the "Classic Airplane." My precision to fold both sides has become a piece of cake.


Second and Third Step:
"Turn the paper over and fold both angled edges in to meet along the central crease" (Ono 22).


"Lift up the object and open out the two loose flaps of paper at the pointed end" (Ono 22).
I accidentally skipped this part and went to step 4 which explains the several creases on the paper but I was still able to do it!


Fourth and Final Step:
"Turn back the pointed end making the fold between the two outer points then lift the object and fold it in half along the central crease" (Ono 22).


"Lift the top flap forward to make the wing, making a straight fold about 1/2 in (1.5cm) up from the bottom. turn the paper over and repeat, then place a little paper glue in the space between the wings and press together" (Ono 22). I noticed gluing between the wings was the most important step of the whole design if not added, it wouldn't even like a paper airplane at all! But after gluing it together, the plane was complete and it looked really unique


              Final Design 
Not going to lie, I messed up a little when going through the steps but in the end, I was able to finish. It obviously doesn't look exactly the one I saw in the picture but it was solid. Even if you fail, just keep trying and it will pay off


Have you ever felt so frustrated that you wanted to quit but still kept going until the very end? If so, how did it feel?

Ono, Mari, and Roshin Ono. Fly Origami Fly. Edited by Robin Gurdon, illustrated by Trina Dalziel, Cico Books, 2010.


The Basics: Origami AIrplanes

The book by Fly Origami Fly by Mari Ono and Roshin Ono shows the different unique ways to make paper origami air planes. This books shows different types of modeled paper airplanes that have become popular over the years. They also try to aim to encourage you to make your own designs. 
The book gives you a huge amount of paper with different designs on it. The authors try to give you lots of origamis suitable for all ages. Origami "has been part of Japanese culture for many centuries" (Onos 6). I've never been really good on origami but I feel if I read this book, it can help me get better and learn more of the history of origami.                                                                                                                                                


But before I start to make making the unique paper airplanes, we need to learn the basic techniques.

Making Folds
"Still holding the paper with your spare hand use a ruler or perhaps the side of a pencil to press down the fold until it is as flat as possible" (Ono 10).
From learning this technique, it helped me have an easier time building my paper plane since it already was flattened perfectly. Small things like these are useful in their own way


Opening folds
 "As the space widens you need to ensure thatj the point folds so use a pencil or pen to gently prise the paper open" (Ono 10).


"As the two corners separate the top point drops forward and the two edges open out to become one" (Ono 10).


What type of things do you do in your spare time?


Ono, Mari, and Roshin Ono. Fly Origami Fly. Edited by Robin Gurdon, illustrated by Trina Dalziel, Cico Books, 2010.


Sunday, December 31, 2017

The Culture Behind the Art


The Culture Behind the Art 


The origami art was originated from japan .The word "origami" comes from the Japanese language. "Ori" means folded and "kami" means paper. "Used as an inclusive term for all folding practices, regardless of their culture of origin. The goal is to transform a flat square sheet of paper into a finished sculpture through folding and sculpting techniques" (Shaffer 11).  Origami is the art of paper folding, which is often associated with Japanese culture.  Origami folders often use the Japanese word refers to designs which use cuts.


Folding pieces of paper was a valuable gift used in japan. "When origami was first practiced, however, it was a craft only for the elite. Japanese monks folded origami figures for religious purposes. Origami was also used in various formal ceremonies"(Shaffer 12).
ceremonial paper folding were important, these models would act as a certificate of authenticity. As paper became more affordable, common people began making origami figures as gifts or creating folded cards and envelope. 


Can origami still carry that deeper and cultural meaning or was it lost due to its wide population throughout the whole world?

Shaffer, Jeremy. “Origami to Astonish and Amuse.” Amazon.com, 6 July 2001, www.amazon.com/Origami-Astonish-Amuse-Jeremy-Shafer

Thursday, November 30, 2017

Does origami benefit your mental health?

Can folding a piece of paper benefit your mental health?

When most people think origami they usually think of origami as a fun activity to do when your bored, but what they don't know it that doing origami has many benefits. Origami provides both mental and physical  with exercise. Origami helps develop hand-eye coordination, fine motor skills and mental concentration. The author Jeremy Shaffer says that the first stage of origami is to decide what to fold, one must come up with idea that practical and realize the importance of concentration, dedication, and creativity (20).  The paper craft of origami has so much thought and  process behind the making and directly stimulate your brain.


Paper folding challenges me to higher level as I follow instructions, learning new skills and activities."More difficult than coming up with the new ideas is actually folding them. Although this requires awareness, a lot of designing ability comes through experimentation and experience following diagrams"(Shaffer 15).  the author explaining that every fold has a perplex meaning and shows your ability of learning new skills. paper-folding allows me to create basic shapes such as squares, rectangles, and triangles.

Do you agree with Shaffer point of views on origami?

Shaffer, Jeremy. “Origami to Astonish and Amuse.” Amazon.com, 6 July 2001, www.amazon.com/Origami-Astonish-Amuse-Jeremy-Shafer


Tuesday, January 31, 2017

The golden seal lion

    For my final post, I decided to use a gold sheet of  origami paper to make my seal lion, from the book under the sea origami by Duy Nguyen. Under the sea origami has taught and shown me the different animals that I can create with origami paper. All of these animals I have never done before, but I have done certain folds that the book teaches and shows how to make such and such folds. But overall this book has enhanced my overall knowledge of origami, in the past I never knew the proper names of certain folds. But with book i now know more and the name of folds.

To make a origami seal lion, you must know the following folds: mountain fold, valley fold, outside reverse fold, squash fold. (Nguyen 30).

Making the seal lion was easy, even though I may had of have some issues getting the creases and folds perfect so that it all comes together very neatly. Especially with the gold origami paper, it is very fragile so I had to extra careful with the folds and creases. Some parts that I trouble with was doing "outside reverse fold". (Nguyen 8). I thought that I had missed a fold while making the seal lion so I redid it, but I just really had to was fold the tail inwards. Overall i did enjoy making the seal lion, espcially in gold.

Nguyen, Duy. under the sea origami. New York: Sterling Publishing Co., Inc, 2004

Do you prefer using a specific color when making an origami figure? 


Origami: Traditional Creations

For this blog, I decided to create an origami design that was designed and created a long time ago. "This creation has a long tradition, and their creators were surely imagiros" (Kasahara 31). Imagiro is a play on word of "origami" written backwards to mean a person with imagination and a friend (Kasahara 32). The traditional origami I decided to create was an origami whale. This design was simple and had basic steps to create it. I found it easy and was good for any beginner to learn with the origami crane. This design started with a different origami base called the fish base, which was simple, but I had to go back to the front of the book in order to learn this base.


As I created this design, I had learned a new concept of cutting. The Japanese word "to fold" could be pronounced differently to mean, "to cut" (Kasahara 30). I had to cut half of the whale's tail in order to create a huge difference in the design, making it look a lot better. It shows how even a little cut can have a huge impact on a design. Overall, this design has taught me its tradition and beauty behind it and a lot about cutting.


Question: Do you like to learn about traditional origami? Why or why not?

Kasahara, Kunihiko. Extreme Origami. New York: Sterling Pub., 2002. Print.
Sunday, January 29, 2017

Origami Piranha

There are many creases in origami, there are many folds in origami, each fold should be as perfect as the last one. In the book. Under the sea origami by Duy Nguyen it shows and teaches you how to do such folds such as Inside crimp fold, or the inside reverse fold. (Nguyen 7).

To make an amazing piranha, you need to know the following folds, squash fold, mountain fold, inside reverse fold, and squash fold one, and pleat fold reverse. (Nguyen 6) and (Nguyen 8).

In the making of the piranha it was very challenging, making the piranha eyes was challenging because i didn't know how to small a pleat "fold reverse". (Nguyen 8). Making this fold made me very frustrated because the fold would crease all the way. And also having to do this for the other eye go me upset having to do this fold again that i couldn't complete the first time. Even though i did have difficulties making certain creases. Making the piranha was a fun and a great new experience in making something that is diffitcult.

Do you like making different varieties of origami figures?

Nguyen, Duy. under the sea origami. New York: Sterling Publishing Co., Inc, 2004


Origami Squid

    In the book, Under the sea origami by Duy Nguyen, he starts of the book with very basic and with essential folds that will help in making wonderful sea origami animals.

To make a squid you must know the following folds, valley fold, squash fold, mountain fold, and the pleat fold. These folds can found in the basic fold section. (Nguyen 6).

When I was making the origami squid it was farley easy and fun to make. The challenge I had when making the origami squid were "pleat fold" and "pleat fold reverse". (Nguyen 8). This part was very confusing to due to the fact that one side had to be a pleat fold but the other side had to be reverse pleat fold. I didn't realize the first time why I was doing it wrong. Due to one side only have one flap and other not having a flap. Even though I had issues making the origami squid I found it to be enjoyable and seeing how it turned out at the end.

What is the most diffitcult origami figure you made?

Nguyen, Duy. under the sea origami. New York: Sterling Publishing Co., Inc, 2004


Origami Dragonfly

Today I decided to create an origami dragonfly. The steps for this design was pretty simple, but was still fun to create. It was a unique design with many folds I have never tried before. the origami dragonfly began with the basic bird base, which was the same starting base for a paper crane.


After that, there were many steps that required you to fold the corners into small pockets in order to create a different shape for the wings (Kasahara 32). One of the steps stated "Roll up [the triangle] to create its head" (Kasahara 32). These folds were unique to me and it has allowed me to learn some techniques that may be helpful when I create other origami designs. The origami dragonfly was different from other creations I have made before because of how it has depth in its folds. Overall, this origami design was very fun to make and has taught me new folds that will be useful in the future.


Question: Have you learned new folds through making origami? Which one and from which origami design?

Kasahara, Kunihiko. Extreme Origami. New York: Sterling Pub., 2002. Print.

Origami Penguin


Origami Penguin


For my last blogpost, I tried to make an origami penguin but it also didn’t work out.  The origami penguin was in the beginner section but required two reverse folds. There was only six steps and I was able to reach step four. Step 5, the step that I was stuck on says, “Outside reverse fold. See how the angle of the head affects the penguin” (Montroll 36). The part that made me mess up was the outside reverse fold because the other reverse folds that I did for the swan and fish where inside reverse folds and the outside reverse fold was new to me. Montroll says that you should fold slowly and carefully and to not give up when you fold something for the first time (Montroll 9). I followed his advice and tried to make the penguin several times but I couldn’t understand how I was supposed to make it look like the one in step 6.


Is it difficult for you to learn new folds?
Montroll, John. Teach Yourself Origami. New York: Dover Publications, 1998. Print.

Origami Fish

Origami Fish


For my next blogpost, I attempt to try the reverse fold again, this time with the fish origami. The fish origami was in the beginner section but was harder for me to do than the swan because it had more reverse folds (Montroll 48). The fish origami had only 20 steps and I was able to reach step 14. I actually did a few reverse folds before I was stuck on step 15. Step 15 had you “Reverse- fold. Repeat behind” (Montroll 49). The part that I had messed up on was when you were supposed to reverse fold at an angle. Since I did not look at the example closely I messed up and it prevented me from advancing.


How do you overcome obstacles in origami?
Montroll, John. Teach Yourself Origami. New York: Dover Publications, 1998. Print.

Origami Swan


Origami Swan

Today I decided to try origami in the intermediate section because I wanted a challenge. The intermediate section says that the origami was “.. build upon the basic folds shown in chapter 1” (Montroll 52). With that being said, I thought that the intermediate origami wouldn’t be that hard but I was wrong. For my first intermediate origami I wanted to make a swan, there were a total of 23 steps but I was only able to go to step 14 because the rest of the steps were confusing to me. The swan starts with dividing your paper into thirds and then doing a few reverse folds near the end. (Montroll 54). Step 15 prevented me from finishing the swan, the step may seem easy but I didn't know how to reverse fold to make it look like the next step. For me, the reverse folds were difficult to do because the book doesn’t do a good job explaining how to do it.


What folds are difficult for you to do?
Montroll, John. Teach Yourself Origami. New York: Dover Publications, 1998. Print.
Friday, January 13, 2017

Origami: Keep it Simple

Sometimes, origami should be kept simple. Not every origami is meant to be complex and look detailed with hundreds of folds, some can just be small and beautiful with its own aspects and simplicity. Today, I decided to create an origami Orizuru, commonly know as the original crane. It was one of the first origami designs I began to become interested in origami. The design is very simple and is one of the designs that represent origami to others. "This beautiful, traditional design has been known since 1797, the year of the book Senbazuru-Orikata (A Thousand Origami Cranes) was published" (Kasahara 31).

I began my crane with a normal piece of square paper and followed the basic steps to create the basic bird base. The steps were very clear and did not require too much thinking, perfect for beginners.
From the bird base, there were a few more instructions that included a lot of creasing and unfolding (Kasahara 41). These steps were very helpful as it made it very easy to fold up many folds that would have taken more time, or even ruin the clean and crisp look of the crane. The origami crane was finished off by spreading and curving the wings out to give it a 3D shape. The outcome turned out great and looked like the cranes in the book. Overall, I had learned that making every required crease can help out and save a lot more time than skipping the small tedious steps.


Question: Is creating complex origami that requires a lot more time and effort worth it or is making simple origami a lot better?

Kasahara, Kunihiko. Extreme Origami. New York: Sterling Pub., 2002. Print.
Saturday, December 31, 2016

Possibilities in Origami

For this month's blog, I decided to do something that had to do with the season. I decided to create an origami snowflake that was shown in the book and expanded my ideas on it by creating different versions, which allowed me to create a variety of snowflakes from just one model. Stated by Kunihiko Kasahara, "The Snowflake reveals a new and multidimensional beauty... a wide field for additional design possibilities" (Kasahara 43).

For this snowflake, it took me many tries and redoes for me to get the paper folds correct. The pictures were easy to read, but the process to reach the pictures were very unclear with only small arrows that overlapped. I decided to go back to the key for the symbols used, which allowed me to see which ones were valley folds and which ones were mountain folds. The directions said to keep into account the marking folds as I made the folds (Kasahara 43). This really helped me as i started to create the folds in the snowflakes because the marking folds allowed me to keep me from being confused of where the folds should be made and the location of the reverse folds.

From this origami snowflake I have learned that you can create many diverse versions of one model and that the arrows shown throughout every picture and marking folds should be taken with a lot of considerations in order to make it look like the correct design. Overall, the origami snowflakes was really fun to make, even with multiple mistakes, I was able to finish and create three different and unique snowflakes.

What's your opinion: Do you like to stick with the original directions or do you experiment to create different version of the original directions and why?


Kasahara, Kunihiko. Extreme Origami. New York: Sterling Pub., 2002. Print.


Origami Hat


Origami Hat


In the book, Teach Yourself Origami by John Montroll, an origami hat is apart of the beginner section. Since I haven’t made a lot of origami I believe that I should try another easy one. I’ve made origami hat’s before but it wasn’t similar to the one in this book. I surprising had difficulty making this one , but that was because the directions weren’t clear to me and reading from a book instead of seeing it done through a video or in person is harder for me to do. In the book it says, “When you fold something for the first time it could seem difficult. If you do have trouble, fold very slowly and carefully and do not give up.” (9) Since, I wasn’t familiar with this style of making a origami hat I was  confused but after trying a couple of times I correctly made the hat.

The most confusing part for me was when it said to fold a layer up. (13) This was confusing to me because I was just looking at the pictures and not looking at the words right next to the picture but after looking back on the previous step I realized that the hat needed to be face backwards. After that I was able to make the hat.

What is the easiest way for you to learn origami?

                           Montroll, John. Teach Yourself Origami. Mineola, NY: Dover Publications, 2011. Print.                                                 
                                                                        
Wednesday, December 28, 2016

Origami Angel Fish

     In the book, Under the sea origami by Duy Nguyen, starts up the book with basic instructions and basic folds that included Kite Fold, Valley Fold. All of these folds are in the basic folds section. 

To make a angle fish you must first have origami paper, can be found at your local craft store. The folds that are used to make the angel fish are base fold three, valley fold, kite fold, squash fold, and mountain fold. These folds are essential in making of the angel fish. (Nguyen 12).

When i was making the origami angel fish was a basic challenge but there were some parts that were confusing for me, which were "Mountain fold layer inward" and "Inside reverse folds". (Nguyen 39). These parts were confusing me because i didn't realize that you must fold the tip back, but i folded the tip forward, by not looking at the steps shown at the basic fold section i wasted time and got very confused when in the first place could have been resolved much more quicker. Even though i do have past experience with origami this shows that there are very diverse folds that can be confusing at times. Hopefully you enjoy my wonderful angel fish.

What folds do you have trouble with? 

Nguyen, Duy. under the sea origami. New York: Sterling Publishing Co., Inc, 2004. 


Wednesday, November 30, 2016

Modular Origami

Modular origami is an origami technique that requires two or more pieces of paper that builds into a single unit. It is something I have never done before, but have always wanted to try it out. It takes a lot of time and effort to create one module, but takes even more time and precision to put the entire piece together. The author says that origami is enjoying the creation and the exploration of new possibilities and inventions (Kasahara 60). This shows how origami is the practice of inventing new things, and how creativity can bring out different forms in them. Origami is very difficult, but always completes itself with the feeling of joy and accomplishment.

I spent most of my time trying to figure out the instructions, as they were very complicated with different types of arrows and lines. Once I understood the meanings, I was easily able to create my modules that came out pretty clean and identical to one another.


As I was creating the modules, it had stated, "Make sure to crease the valley fold through all the layers" (Kasahara 63). This meant that I should make sure the fold I had made was very indented, making it easy to keep its shape and had a line on the module. This advice had helped me immensely when I had to put the modules into one single piece. The folds had allowed me to easily fit each end into the pockets required, making the origami take its shape to look clean.


What's your opinion: Do you prefer single piece origami or modular origami and why?


Kasahara, Kunihiko. Extreme Origami. New York: Sterling Pub., 2002. Print.