Pages

Saturday, December 31, 2016

How to execute a Penalty

In order to execute a penalty to the fullest a player must be physically and mentally prepared as it is not an easy task. Many times a penalty can have a huge impact on the match whether its a game winner or just to equalize the score. The Penalty kick is awarded when the player who has possession of the ball and gets fouled inside the 18 yard box. Also if the math is leveled after 120 the match will be solved with a penalty kick shootout. Normally a team has a designated kicker meaning in the training ground and team he is the one that has the best placement and is secure when it comes to executing a penalty.
In the book that I am currently reading titled "Soccer for Dummies" by Thomas Dunmore it states the following "Choose the spot where you want to aim the ball before approaching the ball.
Avoid looking at the keeper. If it's easier, pretend the keeper is not present.
Focus on the ball. Keep your eyes on the ball at all times and remain focused once focus is lost, you risk losing your composure"(Dunmore56). This basically explains how a player must be fully focused when about to execute the penalty because one little mistake in the run up or kick can mess the whole thing up. It is important for the kick takers to have perfect accuracy and power because the modern day goalkeeper likes to dive before and try to guess where the kicker will kick the ball.  
Applying these things together will make you successfully execute a penalty kick.

Why is it important to be able to take a perfect penalty kick.

Drawing a Face for the Absolute Beginner

        In my first post I explained how I wanted to be able to create my favorite characters. The struggles of being unable to express my appreciation for a character really frustrates me, but what is even more frustrating is not being able to draw said character in the first place. In this post I decided not to draw a specific character (in fear that it would turn out horrible, it'd be an insult to the original creator) but instead, establish how to sketch a head and facial structure by following the book Drawing for the Absolute Beginner by Mark and Mary Willenbrink and adding my own details to it. 

        We learned in my previous post that sketching basic shapes is a helpful tool to begin a drawing. Hence, I started by sketching the basic shape. "Start with the basic shape egg-shape of the head. It should be five eye-widths wide by seven eye-widths high" (Willenbrink 82). The Willenbrink's then suggested to add eye, nose, and mouth lines to guide you in drawing those features (Willenbrink 82).
        
        From here, I added all the details to the face. Since the book didn't have any hair or eye tutorials, I took it upon myself to figure it out. Again, sketching basic shapes immensely did help me. 

        This here is the final product I was best able to create. I did lots of readjusting the facial structure and lines and it didn't turn out as I had hoped. Hair was the most difficult feature for me to create. I can't say I was somewhat satisfied with this outcome, but I did learn that sketching basic shapes is a reoccurring technique that should always be used and that maybe I shouldn't attempt to draw my favorites just yet. What techniques have you guys learned that seem to be a reoccurring or important aspect to always keep on hand? 

        Willenbrink, Mark, and Mary Willenbrink. Drawing for the Absolute Beginner: A Clear & Easy Guide to Successful Drawing. Cincinnati, OH: North Light, 2006. Print.

Python-Interactive Mode and Script Mode

       In Python, there are two ways to code, one way in Interactive Mode and another way in Script Mode. While there are advantages to each both of them, there can be some disadvantages too, this is why you need to utilize both of them to be successful. The advantages to using Interactive mode is that you can test out bits of code to see if they work before you put them into your script. In script mode you can store multiple lines of code so that you can execute it all at once. There are also differences when you are coding in interactive mode and script mode that can also be confusing (Downey 17).
For example:

If you code this into the interactive mode then the output would show up under it
X=126
X*420


However if you type this exact code into script mode the output would be different


As you can see on the left side is the script, and when executed there was no output on the right, or the shell. This is because we didn’t tell Python to print out the output which is sometimes confusing as stated before. “But if you type the same code into a script and run it, you get no output at all. In script mode an expression, all by itself, has no visible effect. Python actually evaluates the expression, but it doesn’t display the value unless you tell it to:” (Downey 17).


Since we added the print command in the script there was a visible output like in the interactive mode.

Question: What are some other scenarios where you need more than one resource to be successful?

Downey, Allen B. Think Python: How to Think like a Computer Scientist. Sebastopol: O'Reilly Media, 2015. Print. 


Japanese cuisine - Sushi

          Before I started making sushi for this project, I assumed that cutting up a piece of fish and placing it on a ball of rice would be simple. But as I finally got hands on experience with creating sushi, I was wrong. Many knife techniques are contributed into the making of sushi. The technique I chose to use was Sogi-Zukuri which is "a technique for thin sushi tops" (Dekura 149). Whereas the Hiki-Zukuri technique is used for thicker pieces of fish. In order to perform the Sogi-Zukuri technique you must slice the fillet at a 45-degree angle and slice approximately 1 cm (Dekura 149). My first couple slices didn't work quite as planned. The angle was slightly off causing my fish to be chunky and unappealing.


         After a couple more tries I finally acquired the skill of Sogi- Zukuri. I wouldn't consider my skill to be perfection because, I can consistently make good cuts, but I still mess up at times. Cutting the fish wasn't the only thing that was challenging. Creating the rice was also challenging. The correct way of creating a ball of rice is by "Combine water and vinegar in a bowl. Wash your hands well, dip your fingers into the bowl of vinegared water, then clap your hands together to remove any excess water" (Dekura 92). On my first attempt my hands were too wet, disallowing the rice to form into a ball and causes it collapse. On my second attempt i used less water on my hands but that made the rice stick to my hands. On my third try it seemed better but i still cant get the right amount of water on my hands to where the rice will form without sticking.
         Assembling the sushi was probably the easiest part of this process. I held the fish on my left hand and slightly cupped my hand. Then, I grasped the ball of rice with my right hand and rested it above the piece of fish. Using slight pressure I folded my fingers causing the fish and rice to stick (Dekura 92). All in all my experience with making sushi taught me a lot about cooking. I learned new knife techniques which can be used in other foods that I make in the future. 

How have you used a knife in your cooking?


Dekura, Hideo, and Danny Kildare. Contemporary Japanese Cuisine: Classic Recipes, Fresh Flavors. New York: Weatherhill, 2001. Print.

More in Depth Lists in Python

I learned how to develop my lists even more and make them more in depth. In the book Python Crash Course it showed me how to use if statements, on page 76 it said, You can change specific elements by using an if statement. (Matthes 76). This taught me how to change specific elements in a list to be more in depth and precise which leads to me being better at programming in the Python language.
Another thing the book showed me how to do was display user input, on page 118 it said, "The input() function pauses your program and waits for the user to enter some text. Once Python receives the user's input, it stores it in a variable to make it convenient for you to work with." (Matthes 118). This taught me how to implement code that can interact with the user which helps me become better at programming in the Python language because interactive programs are very useful.
What types of programs do you think are most useful?

Matthes, Eric. Python Crash Course: A Hands-on, Project-based Introduction to Programming. San Francisco: No Starch Press, 2016. Print.

Art Applies: Proportions and Movement (Jaipal Cheema)

At this point, I am still reading "The Usborne Complete Book of Drawing" by Usborne. The book contains most of the basics needed to get a grasp of everyday art. In the last update, I focused on how a basic structural foundation helps further enhance any other type of drawing and skills. The book layout helps further progress me in my goal of becoming a better artist or even a decent doodler. The specific point in the book now helps bring in all the techniques learned up to this point.
The topic/technique being discussed right now is drawing animals and how exactly you draw them while they're in a particular stance or position. A big factor to this is developing a good understanding of the way proportions of guides are formatted and applied to the drawing. It states "Kittens' bodies are rounder than those of adult cats, and their heads are larger in relation to their bodies. Also, the distance between their front and back legs is shorter. Kittens are less coordinated than adults so they hold themselves differently"(Usborne 28). This quote directly shows how proportions of guidelines are changed and altered dependent on the characteristics of the figure you are attempting to draw. Not just that, they also focus on how the layout of the guides. It also states "The lowered head and drooping head whiskers give this kitten a sleepy, vulnerable look"(Usborne 28). This quote once again shows how the movement of the guide shapes affects the overall image portrayed and what the viewer pulls from the art. From this particular section, I learned a lot, but the main point I grasped was that the guides are more than just a foundation as they can be used to
show movement, as well as the size and proportion of the guides can dramatically change what the image represents. Overall, guides can be altered and built upon in ways which change the image/drawing into something that shows different characteristics.
Question: To what extent should you keep adding minute details? Is there a point at which you  actually make something worst than better by doing so? How does this apply outside of just art?
Usborne, Reece, Smith, and Brown. The Usborne Complete Book of Drawing. Usborne House, 83-85 Saffron Hill, London, EC1N 8RT, England. 1993, Print.

Get Festive with a Winter Themed Polar Bear Towel Animal!

Its that time of the year again. Getting out those heavy boxes from the garage, baking yummy sugar cookies, placing each ornament on the tree precisely and as equally spaced apart from other ornaments as possible (Is that just me), or just binging on Netflix for 8 hours, Its hard to accept that it is the holiday season. Those days where you just sit on your bed all day, thinking whether to do your homework or procrastinate until the 31st, why not add to your Christmas decorations by creating your very own polar bear towel animal! Guest will for sure be in awe of the cuteness of this towel creation on Christmas Day and wonder where to buy one on eBay (which they'll realize they cant buy a towel animal and to make one themselves), which Is why I am here to teach you how to make one! As I have read my book Holland America Line Towel Creations over the past few weeks, I have learned to be more patient and self-conscious with myself when making towel animals. In the end, the accomplishment of adding the googly eyes to your finished product creates a sense of happiness and is something you can share with everyone. Anyway, lets get started!


For materials, you will only need a large 30 x 50 in. towel and a medium sized 17 x 18 in. towel. Add to the festive season by adding decorations such as hats, scarfs, a snowy background, etc. to your towel animal. Recommended, but optional.


Step 1:Starting with the large towel, you will create the main body first. Begin by grabbing the sides of the towel and tightly rolling each side to the center (Holland 62), creating what looks like 2 burritos.


Step 2: "Fold the towel in half joining the four rolled edges together" (Holland 62), creating what looks like now four burritos together


Step 3: Grab the corners of each roll and pull out the center of it to form the body, make sure to hold the corners tight in your hands or else you will mess up (Holland 62). Done with the first part! It should look like what you call a chicken rotisserie


Step 4: Now grab your medium towel to create the head. With it, "Fold towel into three folds widthwise, pull down the corners towards center to form triangle and roll tightly to center"(Holland 62). This step might seem long and confusing at first, but just read it slowly at first and imagine what the outcome would look like. For me at first, I ended up making a square at this step, but with a clear image and goal in mind, I ended up with the correct results.
once again...


Step 5: "Pull down front flap to cover half of [a] nose and pull small edges from back as the ears" (Holland 62) to create the head. This is really tricky at first, but make sure to pull both edges of your towel to the back
Step 6: Place the body in an upright sitting position. Then place the head between the top-middle part of the body (Holland 62) and then add decorations (optional) to your polar bear. Your all finished!

As I continue to read this step-by-step book, I deal with many hardships and tough challenges along the way that hold me at a stopping point. But I should mention that I couldn't do this without the help of my aunt; who helped me clarify some of the steps and even let me use her laptop as a background for my towel animal. Especially during the holiday season, as your loved ones come over for that big family dinner and reflect back on those special moments this year, remember to cherish what you have and don't forget to never stop practicing on your towel animal skills. To end this year, I would again like to ask you for more suggestions and how your family has been with you in times of need.

Happy Holidays Everyone!
Janice Herrador  


Holland, comp. Towel Creations: Holland America Line 40 Designs. Seattle, WA: Holland America Line, 2007. Print.


Shaded Snail

Catherine V. Holmes writes,"Shading is one of the easiest ways to add depth, contrast, character and movement to your drawings"(41). The author recommends the use of a light pencil such as 3B, 4B, 5B, etc. But of course an HB pencil will be just fine as well. I used HB 2. The process started with a sketch of the snail shell:
  
When beginning the shading process Holmes says to pay special attention to glared and reflections on the snail, those are the lightest areas and should be left almost white. I made sure to press lightly as Holmes recommends "don't use the full darkness of the pencil so that areas can be erased..." . Throughout the process I always made sure to keep the value scale in mind, it is a crucial part of shading. This actually took longer than I thought, about an hour and I finally had a snail:
I feel blending was the hardest part of the process. Smudging is messy, but usually my approach. However, I feel it's just not right. What is your blending technique? 

Adrenaline Boosting Workouts


When most people think of adrenaline, they think of the fight or flight response that is triggered when levels of adrenaline are raised. This hormone increases glucose and oxygen levels, which are needed to physically exert your muscles. However, adrenaline isn't used for these certain scenarios, it can also be used for a more efficient workout.

With an adrenaline-boosting exercise is implemented into a normal workout routine, you can do more than you normally would because all of your physical and mental levels are boosted, allowing you to get the same level of workout done in less time.

In reading Men's Health, Get Back in Shape by David Zinczenko, I found a simple yet effective workout, that doesn't even require a machine or weights. This workout emphasizes "alternat(ing) between two movements, such as squats and push-ups, but mak(ing) them explosive by pushing yourself up with enough force so your feet and hands leave the floor on each exercise" (59). Doing multiple things at once forces your body to create adrenaline to cope with everything that is going on. A specific workout that I found was doing 24 squats, then 24 lunges, which seems fairly easy. Then you do 24 more squats, jumping after each squat, then 24 more lunges, jumping between each lunge. After these repetitions, your legs are completely drained, which is a good thing. Finally, you finish with a 2 minute plank (59). Once all this has done, less than 10 minutes have come off of the clock, and an intense workout has been accomplished.


Here I am doing a squat, working my quadriceps and thighs, preparing to explode up for a jump.


Next, I worked on lunges, exercising my glutes and hamstrings, making sure my front leg stays perpendicular and my back legs stays parallel to the ground.


To conclude the exercise, I went to the plank position for 2 minutes, with the second minute being excruciating.

After doing this specific workout, I did some other miscellaneous arm workouts, as well as a bike and elliptical session. I ended up being in the gym for about 40 minutes, but got a complete, full body workout. This adrenaline boosting workout is definitely a master of efficiency.

This workout reminded me of burpees, a workout where you do a push-up, then jump up, then start with another push-up, usually doing only 10 repetitions, but they sure are exhausting. Are there any other workouts that require multitasking that you recommend?

Zinczenko, David. Men's Health, Get Back in Shape. Rodale Inc, Emmaus Pennsylvania, 2009.

Pistols Workout

 “Use your imagination, and this amazing exercise will never stop making you stronger” ( Mark Lauren, 115)
So in the last blog I wrote, I promised to write about the exercise ‘pistol’. Not going to lie, this is a tough one. If you really want to kick it up a notch, this will do the trick.

Bring your butt down all the way down to the heel of your working foot, with the other leg stretched out before you.  Keep the negative movement slow and controlled, then explode back up. 
One way to advance this form,is to keep your hands stretched before you, holding a backpack full of rocks or milk jugs full of water. Get creative, push yourself to hold heavier things and to come up quicker once you are down. If that is too difficult, try only doing down in a very low squat, then pushing up very quickly.  (Lauren, 115) how will you dress up or dress down this exercise?

The one thing I love about the pistols, is that it doesn’t take forever to feel the results, and most importantly, see them. It requires you to push yourself, in terms of endurance, and strength. This form works out your gluts, your thighs, and calves.

Try doing this outside, somewhere serene and somewhere you haven’t been before. I love working out in a different place every week. I know this isn’t realistic to expect for everyone, but it makes all the difference, taking care of your body can be fun, and not always a chore if you get creative. I would recommend when doing this, to breathe slowly. Inhale for 5 seconds, and exhale for 10. Breathing like this will help your body adjust to the strain, and provide as a type of distraction; focus on your breathing and not the pain in your legs. I would also suggest drinking plenty of water before doing this exercise, as well as after. This is very straining, drinking will prevent the next day cramps and soreness.   


If you try ‘pistols’, I would love to know! Send me a picture or leave a comment on where you went, and what you did. And if you have any exercises’ s you enjoy or do often, please leave a comment.

Basic Motions of Cheerleading


CHEERLEADING: MOTIONS


In cheerleading, one of the main parts in cheering is using motions. Motions are basically the movements that bring out the cheer because without the motions it wouldn't be a cheer it would mostly be a chant. With motions you have to be very SHARP and very CLEAN. "Remember to keep your body taut with good posture and no extra movements to detract from the impact of the main motion.(Farina, Clark, Villarreal  132). With motions your timing has to be right as well. In cheerleading there are many different types of motions like a "high V", "T", and a  "broken T". When doing a "high V" your extending both of your arms out to in a "V" shaped with locked arms and they shouldn't be to far behind your head and they shouldn't be to far in front of you face either so they should be peripheral viewpoints. When I first started cheering I always had my arms either in the wrong position or they weren't locked out. With the "T" motion its very simple you're stretching your arms out wide making a "T" with your arms. When I do this motion sometimes my arms begin to slouch and begin to ache because my arms would be locked out and very tight. When I first read this book, "Complete Guide to Cheerleading: All the Tips, Tricks, and Inspiration, it showed me that cheerleading does have simple but very articulate aspects but its only to make the performances beautiful and perfected for the watchers.


 So after talking about motions, do you think that cheerleaders like me will improve on their motions ?


Citation:
Farina, Christine, et al. The Complete Guide to Cheerleading: All the Tips, Tricks, and Inspiration [With DVD. Ed. Adam Brunner. Minneapolis, MN. MVP Books,2011. Print.


Nervousness

Being nervous is a normal and common feeling anyone may encounter. In Stuff Good Players Should Know, Dick DeVenzio explains to us that every basketball player experiences nervousness and it is totally usual, but every player should embrace the nervousness. He tells the reader, "Be nervous, enjoy the fact that you have a game to play, a contest to win, a challenge to confront, that is right out in the open, in front of people who care whether you succeed or fail" (DeVenzio 170). What he means by telling the readers to be nervous is that it's good to be nervous because it shows that you choose to battle hard for wins while knowing that you have a chance of losing (DeVenzio 171). 

Nervousness is a big part of an athlete's life. DeVenzio says, "The next time you get that nervous feeling, you ought to recognize it as the great opportunity... and say to yourself, 'Here's the nervous feeling, that hope-and-fear quality that makes playing sports such a special opportunity. I'm not going to hide from it... I'm nervous. Great. Just what I wanted'" (DeVenzio 171). He says to acknowledge the nervousness because of the opportunity behind it. 

I chose to write about this part of the book because I feel like I experience nervousness before every game, tryout, and even sometimes before practices. After reading this in the book, it made me realize that it's normal to be nervous, and that I shouldn't let the nervousness scare me. 


I learned that you can let the nervousness break you down, or you can just enjoy it. So, now when I'm nervous, I choose to enjoy the nervousness and not worry about it. Reading this has really inspired me to be less scared while playing basketball and just embrace the feeling of being nervous. Some ways I can cope with nervousness when I can't find a way to enjoy it is to just keep calm and play how I am supposed to play. Also, I can take deep breaths and do what I have to do to help win. 

So overall, nervousness is something that shouldn't be something to hold someone back from doing the things they do. Nervousness is just showing you that you have an opportunity to win.

Have you ever encountered nervousness? How did you react to it?

DeVenzio, Dick. Stuff Good Players Should Know: Intelligent Basketball from A to Z. 3rd ed. Stafford, TX: PGC Basketball, 1983. Print.

Mini Banner

Hi bloggers! I hope you're enjoying your last days of winter break. For my last blog this month i will be creating a mini banner you can use for your locker or as accessory to your room.

Materials:

  • colored duct tape ( 1 or more)
  • 1/8 inch wide ribbon or string
  • scissors
  • permanent marker or paint pen                                                                                                                                         
First gather all the materials, then make and offset double side strip (Wallenfang, 7). Make sure the tape is four and half inches long (Wallenfang, 26)
                                                                                  
The second step is to trim away the 1/2 inch sticky side that's up, then fold over and stick the sticky side that's down to create the ribbon tunnel (Wallenfang, 26).                                                                                                                             

Third step; trim the pennant shape with scissors.


Repeat all three steps for the next pennants ( depending on what letters you want to put on the banner).

Fourth and final step, thread the pennants onto the ribbon/string; add the letters with a paint pen* in my case i'll be using a black sharpie* (Wallenfang, 26).


What kind of changes/alterations have you made in a craft work? if so were you successful?


 Wallenfang, Patti. Just Duct Tape It! Little Rock, AR: Leisure Arts, 2011. Print.

Equine Communication

Horses can communicate with people in very slight ways. They can detect anything from expressing emotions through body language to a person leaning back while riding. For example, if you lean back in your seat, the horse will take that as a queue to slow down or stop, depending on the field of riding you're in. And in horse sports where you are meant to go fast, you will sit forwards in your seat and lift yourself out of the saddle and over the horses withers, a signal to go. In the book How to Think Like a Horse by Cherry Hill, there are a few written examples of why this happens. Hill writes "Since horses begin reading your body language the instant they see you, be aware of how you move and act around them. Your body language consists of where you are in relation to your horse, your overall stance, and your movements. You posture and movements can indicate, among other states of mind, confidence and strength or insecurity or aggressiveness...Your body stance and movements will tell a horse whether he should be afraid, attentive, or relaxed" (Hill 123). This gives proof that horses will react based on the riders appearance around them. 

While riding, you want to keep your hands soft and not pulling at the bit because the hands direct the horse, and legs should be resting behind the shoulders on the horses' ribs. You should also sit back in your seat to keep the horse at a slower more relaxed pace, and example given in the riding below.


For the rider, Hill says that the body is essential for communication, and during ground work your body position and activity can help give the horse an idea for when to stop, turn, and go faster. It takes a lot to practice proper choreography when working on the ground with a horse (Hill 123). More proof is given by Hill when she says artificial aids are important to extend arms. These include longe lines, whips, crops, halters, chains, and lead ropes. They intensify the movements of our hands and help direct the horse (Hill 124). To try this, I longed Leo on the ground, using a longe line and a flag, which is like a softer version of a crop. 

From the information I learned from the book I am able to use correct body language around a horse, and know how to correctly longe. The video above is from me longing Leo a long time ago, and now I am able to find differences and things I can improve on in both riding and longing. Now I can correctly deal with my horse while riding and doing ground work. 
Hill, Cherry. "How to Communicate with Your Horse." How to Think like a Horse: The Essential Handbook for Understanding Why Horses Do What They Do. North Adams, MA: Storey Pub., 2006. 123+. Print.
How do you think a horse would react if you jumped at it while longing them? Do you know any reasons that a horse would react differently if you distributed your weight farther forwards or backwards? Would a horse react differently if you used a crop for longing instead of a whip or flag?


Alright Brownies

For my second attempt at cooking I decided to bake brownies. I think that I succeeded better at brownies then I did at milkshakes. I think that I learned that following the recipe doesn't always get you exactly what you expected. The recipe called for "2 ounces of unsweetened chocolate" (107) and so I looked up the conversion chart for ounces to tablespoons and it was 4 tablespoons.

First I gathered all my ingredients and then in medium saucepan I melted butter and unsweetened chocolate (107). After that I took it off the heat and then I mixed in eggs, sugar, and vanilla extract. Then I mixed in the flour and poured it into a pan. I had previously heated the oven to 350. I put the brownies in for 30 minutes and then took them out and let them cool. I think that they tasted good.

Do you like chewy or not chewy brownies?


Darling, Jennifer. Better Homes and Gardens New Cook Book. Des Moines, IA: Meredith, 1989. Print.

Cheerleading Jumps

Whenever people are watching a cheerleading routine or watching a football game, their attention can be pulled towards the cheerleaders jumps. If you use the correct technique and precision, these jumps can look amazing; even if you can only jump a foot off the ground and don't have your splits. A helpful non-fiction book called The Complete Guide to Cheerleading: All the Tips, Tricks, and Inspiration has emphasized this statement often talking about how anyone can be great at jumps if they work hard and practice; but can climb to the top and be the best once that person gains flexibility, height, and endurance.

One of the most common jumps that you will see be used in a cheerleading routine or on the sidelines is called a 'Toe Touch'. This jump is comprised of jumping in the air to a set of counts, and the effect of having both legs flat in the air, as if you are sitting on the ground with your toes pointed out. Many people think that this is the simplest jump to do, and that "anybody can do it"; but it takes more than that. On page 37 of  The Complete Guide to Cheerleading, Christine Farina and Courtney A. Clark instruct us with this jump by saying, "From the start position, jump your legs into a spread-leg-toe-touch position. Although the name of the jump suggests you will touch your toes, hit a nice T-motion at the height of the jump. Be sure to keep your chest and face up" (Clark, Farina).

The instructions on a toe-touch have helped me very much with my jumps; especially my Toe Touch. When I was with my first cheerleading team at a cheerleading competition, we nearly got 1st place; but was placed in 2nd by 1.5 points because of our jump section. I do admit, as a group of 5-12 year olds, our jumps were not perfect. We received less points from our jumps because we did not keep our heads or our chests up; but once I read this section of the book and learned from my mistakes, I have now perfected my technique in my jumps, even though I am not the most flexible, or the highest jumper in the squad. :)
Image result for cheerleading toe touch


My question for all of my readers of this post is:
What is an example of a skill you have practiced and learned that people often underestimate?


MLA Citation:
Farina, Christine, et al. The Complete Guide to Cheerleading: All the Tips, Tricks, and Inspiration [With DVD]. Ed. Adam Brunner. Minneapolis, MN: MVP Books, 2011. Print.


Rich Chocolate Cake

This next recipe that i will be sharing with you guys was the toughest recipes I've done for this Independent Reading Project so far. There was so many bumps (literally) and challenges that i faced doing this but through all those challenges, the outcome was better than ever. This recipe will feed about 4-5 people depending on how many slices a person wants. In the book, there was an option of doing this recipe as a cupcake or just as a whole cake but if you decided to, "this recipe would make 24 cupcakes as well" (Pansino 27).

The ingredients you will need are:
- 1 & 1/2 cups of all-purpose flour
- 2/3 cup unsweetened cocoa powder, plus more for dusting the pan
- 1 &1/2 teaspoons of baking soda
- 1 teaspoon baking powder
- 1/2 teaspoon of ground cinnamon
- 1/2 teaspoon salt
- 1 & 1/3 cups of granulated sugar
- 2/3 cup firmly packed light brown sugar
- 4 large eggs
- 1/3 cup of water
- 2 teaspoons of vanilla extract
- 1 cup of sour cream
- 1/4 cup of vegetable oil

Directions:
1. The first thing you will need to do is gather your ingredients and
pre-heat your oven to 325 degrees Fahrenheit then after that, grease a 9 x 13-inch metal pan. Now this was kind of weird for me because whenever i see a cake, i dont see it in a baking pan. I usually see it in a round baking pan so i decided to change that and use a round pan instead of a basic baking pan. Line the bottom of the pan with parchment paper and dust some cocoa powder on the pan.
2. In a large bowl, whisk together the flour, cocoa powder, baking soda, baking powder, cin
namon, and salt. After those are all mixed, mix in the sugar in until evenly combined and then set that aside. A thing that was challenging for me was that i kept getting little "rocks" of brown sugar and you dont want those because you dont want to take a bite of just brown sugar in your cake. So, i got a pair of gloves and popped the brown sugars so i didn't have any bumps!
3. In a medium bowl, whisk together the eggs, water, and vanilla and then after that is mixed, then add the sour cream and oil.  After the two mixtures are evenly mixed, your gonna make a hole in the dry mixture (this is called a well) and then you would add the wet mixture into the whole and then in a folding motion, mix the two mixtures until there is not more dry streaks of flour but DO NOT OVER MIX!
4. Pour the batter into the prepared pan and spread evenly then tap the pan on the table to get rid of any bubbles. Bake for around 25-40 minutes or until a wooden pick is inserted and it comes out clean. For me, 37 minutes was fine.
5. Let the cake cool in the pan for about 15 minutes and also in the book, the author says that if this necessary, you can loosen the cake from the sides of the pan with a small knife (Pansino 27). Carefully flip the cake upside down onto a wire rack or a plate that can fit the cake and peel off the parchment paper, and then flip the cake right side up and decorate (always optional)
NOTE: if making cupcakes with this recipe, line the 24 cupcake trays, fill them almost 3/4 full, bake for around 18-20 minutes, and then let them cool for 15 minutes and decorate (optional)
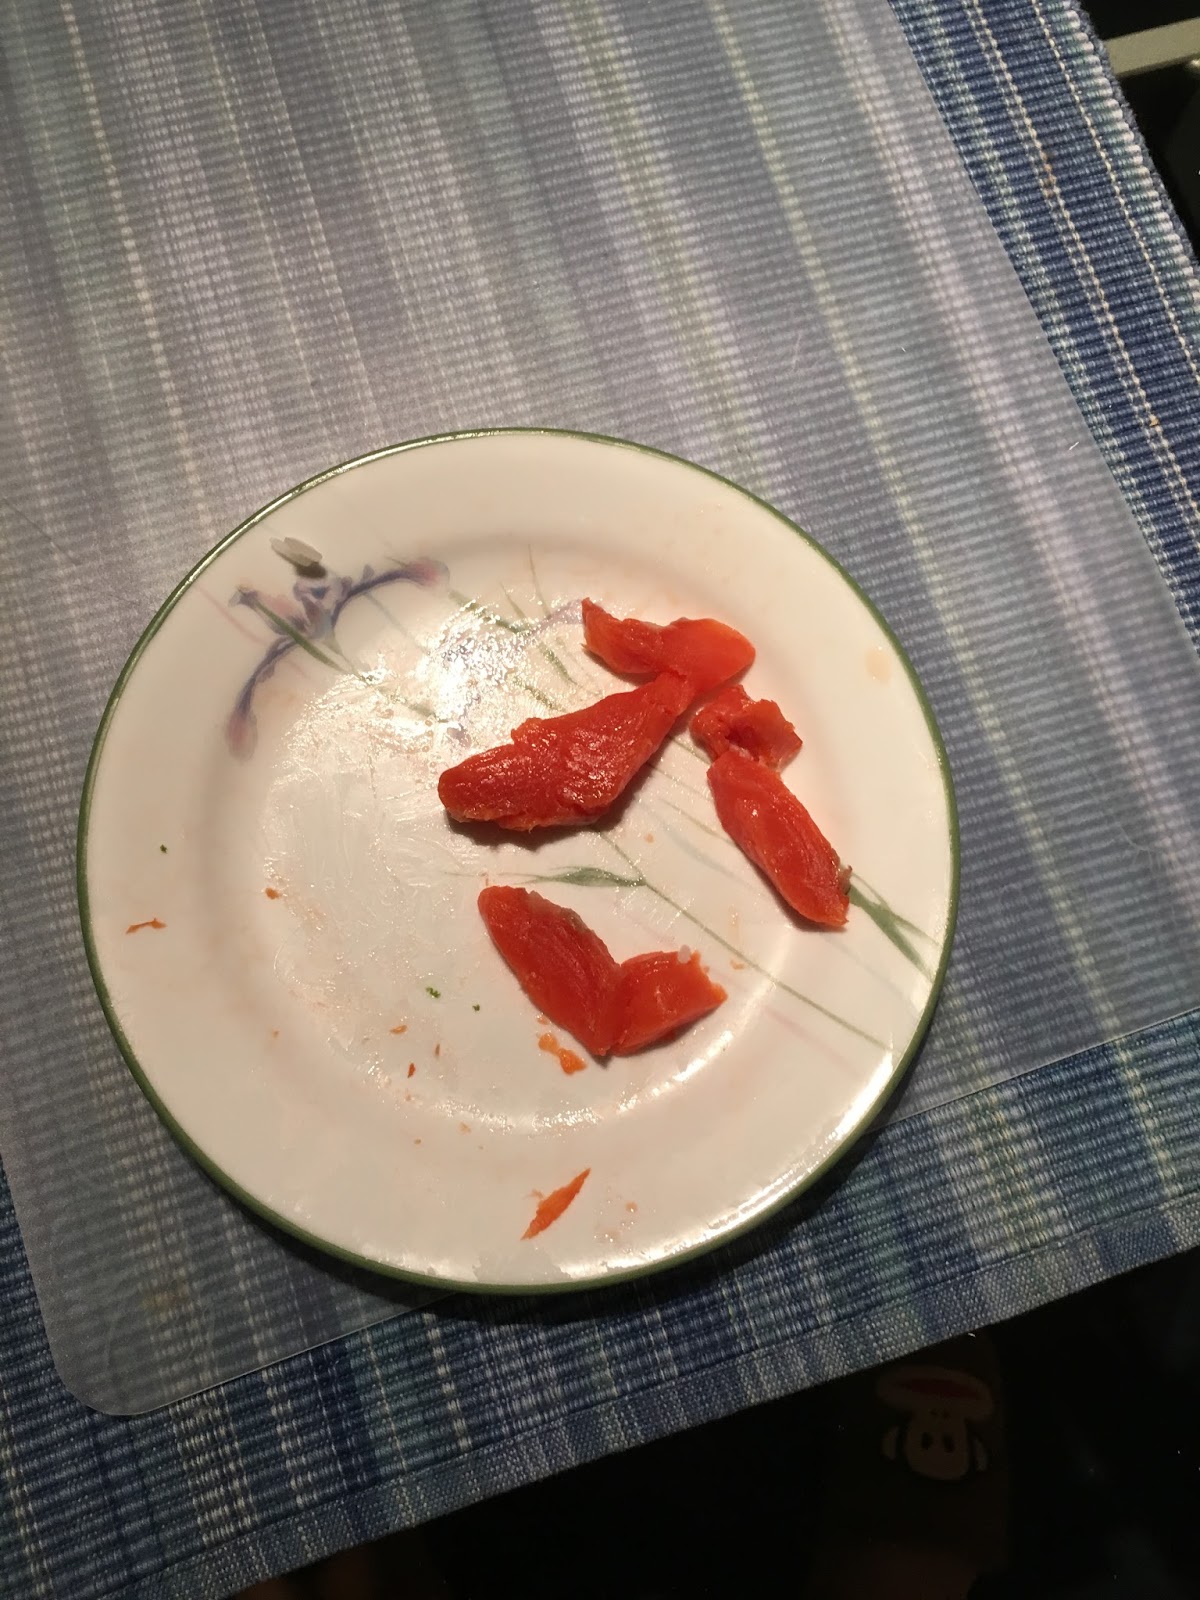
Final Presentation:

Although this was the hardest and most difficult recipe i made for this IRP, it was definitely the tastiest. The cake was super rich, rich to the point where it started to taste like dark chocolate. It was super fluffy and absolutely perfect and adding frosting made it 1000 times better. One tip that i do have for you if you ever do this is to make sure there are no bubbles or pieces of sugars because i did find one big chunk of brown sugar in one a slice that i took out. Just make sure to mix the dry ingredients carefully but other than that, it was amazing. If i had to chose which recipe i would do again out of all the recipes iv'e done so far, i would definitely chose those because the cake was seriously so good! In the end, there were some challenges to face along the way but the outcome was to die for!


Question: What's your favorite cake flavor and why?

Citation: Pansino, Rosanna. The Nerdy Nummies Cookbook: Sweet Treats for the Geek in All of Us. New York: Atria, 2015. Print.

Eyeshadow

Everyone has a hobby. my hobby is that I like to do my makeup. If you think about it, doing your makeup  is like creating art on a canvas. sometimes I would like to consider that my face is like a canvas. I would pretend that my foundation and powder were the  base of my canvas and the colors that I would add to my cheeks and eyes are the real art that I was creating.

For the look I was going for I started to gather all of my materials that I needed to create the  look that I was going for. In the book Face paint the story of makeup by Lisa Eldridge it states that " Max Factor introduced his color Harmony principle in 1918, stating that blondes, brunettes, brownettes, and redheads all required different colors to look best." (Eldridge 130).  So, while gathering my materials that I needed which included the Morphe 350 pallet, Morphe brushes R42 and R39 and a primer,while doing so,  I looked over the pallet to choose colors that would best suit my brown eyes.

First I started off by priming my eyelids and getting a pale peach color and adding it the the crease of my eyelids  and blending it out while making sure that I blend it in a motion that includes the Eyeshadow to go above my crease. Next, I took an orange colored Eyeshadow and added that on top of the original Eyeshadow and I made sure to blend it so it does not have any harsh lines. Then. I added a white Eyeshadow to the middle lid and inner lid. I made sure to pat it on with the R42 brush and then later blend it with the R39 brush so it all looks blended and the colors corresponds with each other. Lastly I added a sparkly Eyeshadow the the inner eye and the just below my brow bone.

we all do our makeup differently so my question to you guys is...
what do you do differently then me?
do you like to do natural looks or more dramatic?
what types of colors do you use that you found best suites your eye color?