Pages

Showing posts with label Fun. Show all posts
Wednesday, January 24, 2018

Roaring Fire: Origami Airplane

I wanted to finish off with a bang for my last paper airplane and what a better way to do it, is to make the "Roaring Fire." When I first saw the design, it looked insanely cool. The skill rating was between the medium and hard side but I knew I had to try it for myself. The description bought me in. "This airplane will light up the sky with its roaring fire. The flames will seem to glide behind the model as they flare across its wings. The large wing area, made by first folding the paper across its width, helps this airplane stay aloft. A powerful launch lifting it high into the air will see it blaze a trail across the sky" (Ono 60). Well, it's time for me to finish this.


Doing it a little differently from other blogs, I am showing the final design before the steps to show you how I got it from just sheet of paper to this.


The Paper Design:
From what I could already tell, the paper was different than the others. It was wider and it looked like it was going to be less complicated than I thought.


Second Step:
"Next turn the tip back so that it sits on the far edge of the paper" (Ono 60).
The first step was the "basic fold both corners onto the middle" so transitioning to the second the step, I had to fold the tip on the edge of the paper.


Third Step:
"Fold the tip back so that the new crease lies half between the new edge and the original flaps" (Ono 60).
When doing this, I made sure to use ruler so I knew if I was lying the new crease in the middle of the original flap. It helped a lot.
After the third step, I flipped the paper over and folded it in half, leading it up to the fifth and final step!


Final Step:
"Place a ruler against the object to make a crisp, angled fold for the wing, starting at the end tips of the plane. Turn over and repeat on the other side to finish" (Ono 60).
The ruler part was super helpful. I would recommend to use it as tool for other paper airplanes to build in the future.


Question:
Have you ever tried something you thought you would never do but end up liking it?


Ono, Mari, and Roshin Ono. Fly Origami Fly. Edited by Robin Gurdon, illustrated by Trina Dalziel, Cico Books, 2010.


Monday, January 22, 2018

How to Be Totally Miserable: Relive Your Bad Memories

As humans, through our lives we experience heart ache, sorrow, grief and guilt. As we continue to focus on the bad experiences of our past, the more we will be felt weighed down by the sorrow of those rough times. We will continue to stay in dark place, with what seems like no help and no way to escape that darkness. 

However, there is always a light at the end of the tunnel. John Bytheway finds an easy solution to this overarching problem by saying this:

  "There you are, faced with a pile of videos labeled 'memories,' and a VCR called your brain. Hmmm, which tape should you play? It depends on whether you're trying to be happy or miserable [...] As with all other video selections, you have a choice" (17).


        John Bytheway reminds us of our freedom to choose. We get to choose weather we are going to have a flour or corn tortilla at Chipotle so it should make sense that WE get to choose what memories to reminisce. This week, I choose to remember the happy times and not replay my bad memories.  I like to remember my memories from summer which allow me to stay positive much like I do during while I'm out in the summer sun. 

       “Your imagination is yours. You can remember the past you choose, rehearse the future you want, and identify with the real and fictional heroes and events of your selection" 

- John- Roger and Peter McWilliams 


                  ((What's your go to memory you think of when times get tough?))

these are a few of my favorites to think of:

 Left- Right: This summer when I hiked a mountain, When I met John Bytheway (the author of this book) and lastly, my best friend Cosette Ray :)


Bytheway, John. How to Be Totally Miserable: a Self-Hinder Book. Shadow Mountain, Salt Lake City, Utah. 2007


Wednesday, January 17, 2018

The Classic Airplane

After learning a few tips from the book. I finally begin to start my first Paper Airplane. It was called the "Classic Airplane." I figured to start on the most basic one so I could try to get a good feel before starting on the other crazy ones. It had a caption which a part of it said, "This classic paper airplane is a model that has been much loved for generations because it flies very well even thought it is so quick and easy to fold" (Ono 18).
                                                                       

My Design:                                                                                                       I've decided to use this paper design to build my first "Classic Airplane" because I noticed this was the only paper that didn't have a specific type of Paper Plane for it.    


First Step:    
"Make a crease down the center of the paper by folding it in half then opening it out again. turn in the corners of one end of the paper so that the sides lie along the central crease with the corners next to each other" (Ono 18).
Like any other airplane, this comes to no surprise to crease it down the center of the paper since it is called the "Classic Airplane."
I am able to do this easily.


Second Step:        
"Fold the new edges in so that they also meet along the central crease" (Ono 18).
Again, I had no problem doing the step of the instructions. The tips from the introduction helped me get an accurate fold.                                              


Third Step:
"Turn back the nose, folding it about 1in (2.5cm) from the end, then turn the object over and close up the plane along the original crease line" (Ono 18).
After this step, I made sure to flatten the paper with a textbook to avoid the paper from hanging out so I didn't have to use my hands to press it down.

Fourth And Fifth Step:
"Turn over the wing at a slight angle so that the plane's body is deeper at to back than the front" (Ono 18).
"Turn the plane over and fold down the other wing so that is exactly matches the first then open out the wings so that they sit together, at right angles to the body" (Ono 18). I didn't feel the need to add any pictures for the last two steps because it was pretty self explanatory.


Do you enjoy doing origami? Why or why not?


Ono, Mari, and Roshin Ono. Fly Origami Fly. Edited by Robin Gurdon, illustrated by Trina Dalziel, Cico Books, 2010.


Thursday, February 2, 2017

Have Fun!


               Lots of people get super frustrated while golfing and I do not blame them. I know I get super frustrated whenever I golf. Golf is a 50% skill and 50% mental. That is not a true stat but it is something that I believe is true because I have learned many skills in the game of golf, but when it comes to actually playing, I cannot seem to perform the way I want. I can go to the driving range and hit a regular drive straight 10 times in a row, but when I get out onto the course, I might mess up once and that throws me off for the rest of the game.

               A problem that many golfers have is that they let one mistake get to their head. Like I said earlier, I might mess up on one thing and then for the rest of the round I cannot seem to play, as I know I can. This happens to lots of golfers, for example they will hit a bad drive on the 4th hole and for the rest of the holes they will be trying to over correct and fix their mistake. Let’s say someone slices and hits the ball to the right on one hole. The next hole they are going to try to rotate their hands and end up pulling the ball. This means that they will hit the ball to the left of them, this usually happens because they are afraid to make the same mistake they made on the last hole.


               In the picture above there is a picture of a man that is calm and having fun. That is the main point in golf, even if you are making mistakes you have to be able to let it go and refocus on the next hole. As I have been saying repeatedly, the biggest mistake golfers make is overcorrection. Therefore, this golfer up top is a good example of someone who is having fun while the play.


               Question: How much money do you think people pay to play a round of golf?
Tuesday, January 31, 2017

Give Your Bae a Swan Towel Animal For Valentines Day!

Not sure what to give your significant other for Valentines Day? Don't settle with a meaningless box of chocolates, why not give them a swan towel animal instead! They will be in awe of your talent and effort to break the boundaries of a standard Valentines gift. From my experience from reading Holland America Line Towel Creations, I will be demonstrating the steps and instructions on how to make this easy towel creation!


For materials, you will need a large 30 x 50 in. towel and a medium sized 17 x 28 in. towel in order to create this towel animal. Additional accessories like googly eyes or decorations I would recommend to your towel creation, but its not necessary.


1st: For this step I recommend you have a hook attached to a wall so that this step can result in a more accurate towel fold. Either way, grab your large towel and "Latch the towel onto a support and tightly roll both sides of the towel to the center." (Holland 85)


2nd: Flip the towel over and grab the tip and fold it around 3/4s backwards (Holland 85)


3rd: Grab the very tip of the towel and curve it (Holland 85) to form the neck and mouth of the swan


4th: Now get the medium sized towel from before and "Spread over towel over the bottom body and tuck two corners into the front of the body"


5th: Finally, "Pick the center up and put the rest underneath to make it stand" (Holland 85). Optional, add any decorations or googly eyes to your swan. If not, your all done!

As I come to a close with my blogs, my journey with creating cute and adorable towel animals was a fun yet challenging task. I would make towel animals for my own use or to bring joy to others, either way, I consider this my favorite hobby or activity I would do in my spare time. For this Valentines Day, my hope is that you create or give something meaningful and special to your loved ones. For this, I ask you what is your favorite activity/hobby?


Thank you for reading my blogs throughout this season!
Have a Great Day!

Janice Herrador


Holland, comp. Towel Creations: Holland America Line 40 Designs. Seattle, WA: Holland America Line, 2007. Print.

Hang On Through Finals With a Monkey Towel Animal!

Ever felt like you were at your maximum limits, that you just want to give up, that you have no motivation to carry on with life?

Welcome to finals season!
Is it just me or that I personally dread this time of the year. Test and presentations back-to-back with hours of preparation and studying, I'm going to need better motivation other than getting an A on my chemistry test (which I am barely passing that class anyway). So as we all brace for finals, why not take a break from studying by making a monkey towel animal based off my book Holland America Line Towel Creations! Recommended by Ms. Robison, I'll demonstrate the steps and instructions on how to create this monkey with ease.

Materials you will need for this will be a large 30 x 50 in. towel for the main body and a medium sized 17 x 28 in. towel to create the head for the monkey. Additional materials like googly eyes or fun decorations are optional but not necessary.

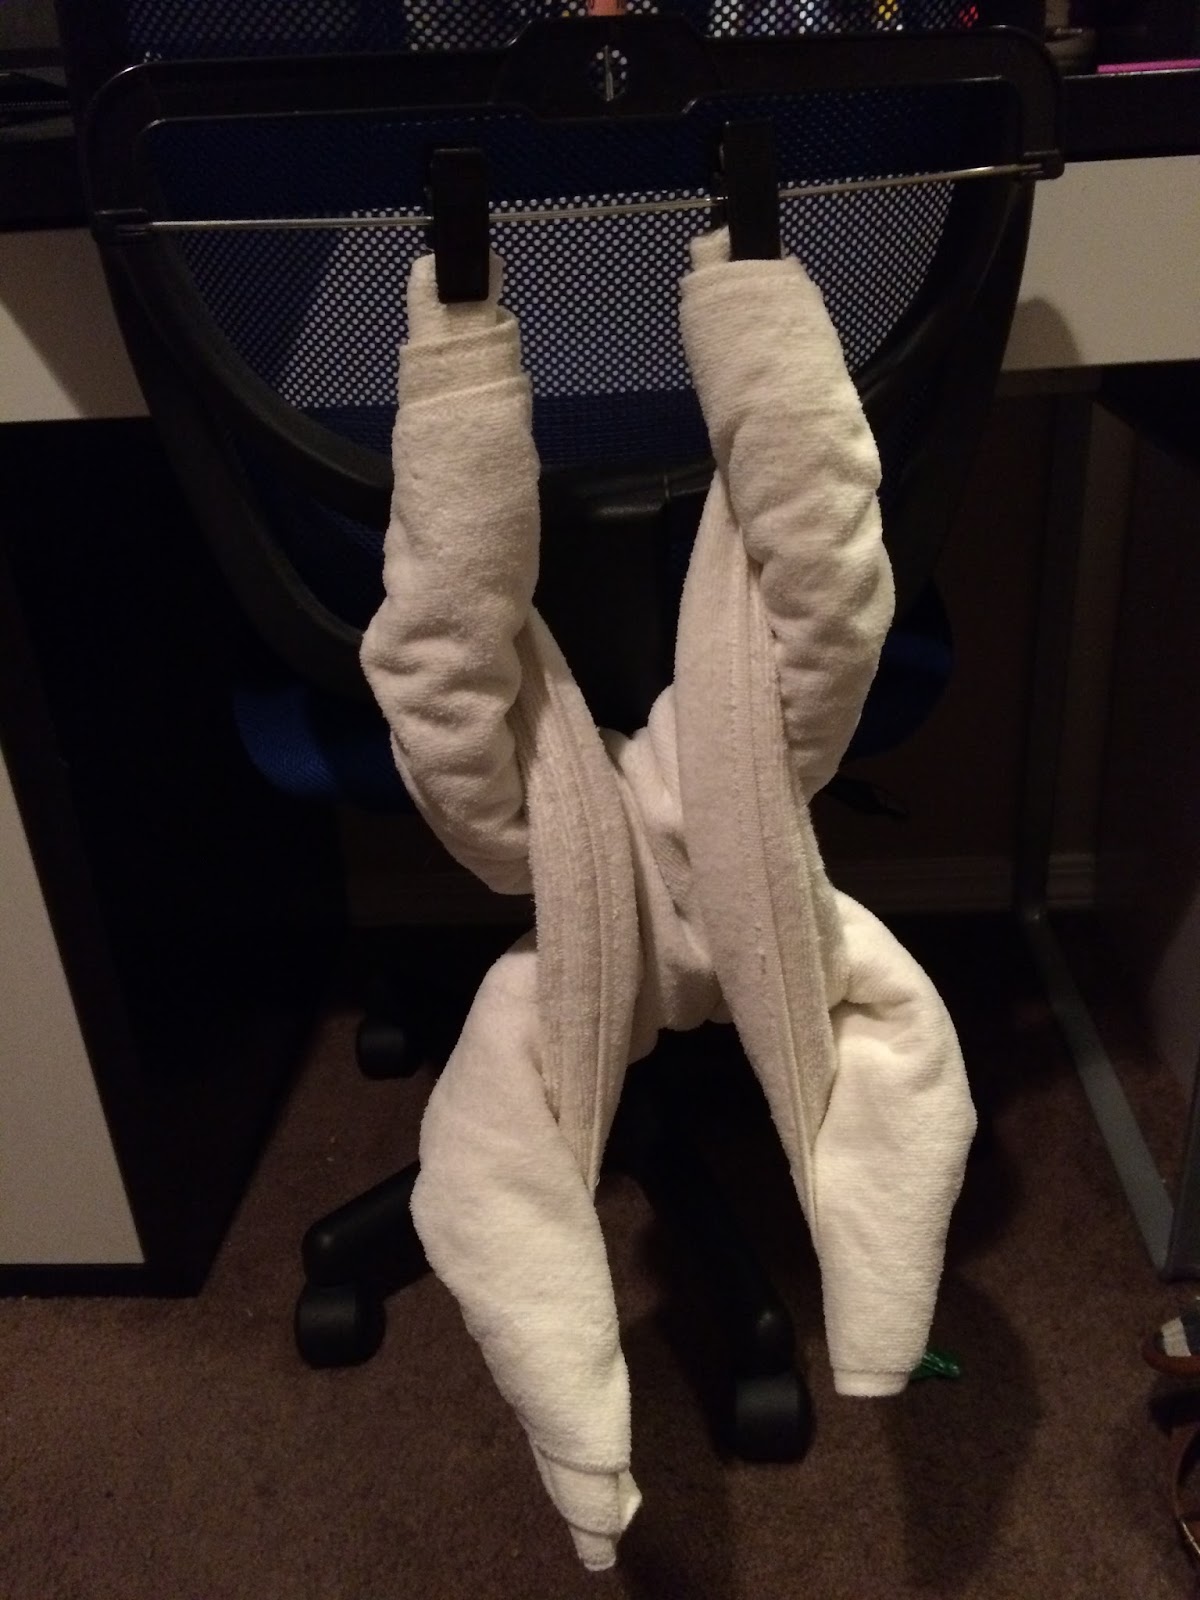
1st: You may have seen these steps in my previous blogs, but you will need to lay out your large towel and "Roll widthwise tightly into the center from both edges" (Holland 53) to form what looks like 2 burritos.

2nd: Fold your towel again in half so that the edges are together (Holland 53), but now it looks like 4 burritos clumped together!

3rd: Finishing up the main body, "Pull out the center of each roll to form the body" (Holland 53), then your going to need a clip or hanger that holds the body in an upright position.

4th: Now that your done with the body, lay out your medium towel  to fold it in half widthwise and then fold it in half again (Holland 53).


5th: Grab the corners of the towel and pull them down to the center of the towel (Holland 53), to form a triangle
6th: "Fold the triangle backwards, take the loose ends from each side of folded triangle and fold back" (Holland 53). Almost done!
7th: Wrapping this up (see what I did there), "Shape the side with the flaps into the mouth and place the head on the body" (Holland 53). When I placed the head between the hands, it would fall out of place, so i recommend using a clip to hold the head in place. After that, your done!
Big tasks or assignments can take a toll on your ability to learn or think after a long period of time, so it's important to take a breather once in a while. Anything from having a snack break or using 20 stress balls at a time, let me give you another alternate activity that will for sure clear your mind from stress. This works for me all the time, which makes me wonder why I have such a bad grade in Chemistry... Or ending up with piles of towel animals all over my room...
I want to ask you how you clear your mind from stress when you have big tasks coming up.

Have a Great Day Everyone!
Janice Herrador


Holland, comp. Towel Creations: Holland America Line 40 Designs. Seattle, WA: Holland America Line, 2007. Print.