Pages

Sunday, November 30, 2014

Swimming Drills


Like all sports, there are many ways to improve in swimming. In the book Total Immersion: The Revolutionary way to Swim Better, Faster, and Easier it talks about the fastest ways to make your swimming strokes faster. It says that the best way to get faster quicker is to do drill sets but it also says if you do too much of them and tire yourself out to where you are not doing them right anymore then it will do more harm than good (Laughlin 85). In my experience trying this out I noticed that the author was definitely right. The more sets I did the more tired I got and I wasn’t doing them correctly.


During my time at the pool I used another set of advice from the author. In the section it said, “Practice drills in 25-yard repeats, resting 10-15 seconds in between. Every rep should feel a little smoother and more relaxed, a little more precise and economical” (Laughlin 85). I did this set and I will continue to do it because I feel that over time it will improve my stroke immensely. I stayed very smooth and it made my stroke longer which is better for races in the long run.

Have you ever wondered while you were swimming and splashing around with your friends, is there an art to swimming? Or how do I become a better swimmer in a small amount of time?

 Laughlin, Terry, and John Delves. Skill Drills: The Fastest Way to a Faster Stroke. Total Immersion: The Revolutionary Way to Swim Better, Faster, and Easier. New York: Simon & Schuster, 2004. 85. Print.

iPhotography

You could ask almost anyone what type of phone they have and they would say they have an iPhone. Now, a lot of people use their cameras for taking selfies, but I would prefer use it to my advantage and use it for photography. This is why I chose the book "Sixty Tips for Creative iPhone Photography" by Martina Holmberg. She takes the iPhone and uses the camera to create great shots of everyday life.


 In chapter 3 "Develop Your Eye", Holmberg shows how to use your phone camera to your advantage by changing perspective, shooting from the hip, creating depth. Recently I've been changing the perspective in my photos by looking at potential photographs in a different way; this means having to get into different positions and angles to create the shot. "Make yourself really uncomfortable for one day and shoot lying down, standing up, sitting on a chair, upside down, and from another perspective you haven't tried before" (50).

Using these tips have really helped my photography. This book just goes to show that you don't need a fancy Nikon camera to take really unique pictures. "When you look at the images, you'll see how the new perspectives have provided diversity and variation." (50) Using these tips, I know creating photos won't be easy, but the outcome will be worth it.

Would you risk sitting in wet grass just to get that perfect picture?


Citation: Holmberg, Martina. Sixty Tips for Creative iPhone Photography. Santa Barbara, CA: Rocky Nook Inc. 2012

Motocross - Safety First!


SAFETY FIRST!

Safety is the most important part about motocross. It doesn't matter if you're going out racing or just going trail riding, accidents are unavoidable. It's a good idea to try and prevent them, but with how dangerous this sport can become, it must be restated that they are not completely preventable. A good rule of thumb to use before deciding to try motocross is to make sure that you can confidently ride a bicycle and haven't had a bike crash that was your fault for at least a year. Also, be sure to carry a phone or have someone ride with you who has a phone. This is important because if you crash and fall unconscious, help can come quickly. One of the biggest rules of riding as well would be to wear a helmet. There have been too many times where people have suffered brain damage or even death by not wearing a helmet. Also you want to dress for success. This means that you shouldn't go riding in a T-shirt and shorts. This is a horrible idea because A, if you crash you may need a skin graft or two and B, if you crash and your motorcycle falls on top of you, your legs will be burned by the hot engine. Another good tip is to know where your engine-stop or 'kill switch' is. This button or switch is usually on the left side of the handlebars as seen in the picture below. It's usually bright red or orange so it is easy to spot. This switch can easily save your life. For example, I had crashed a cycle and had my lover leg, just above my ankle stuck inside the chain and sprocket of the bike. I had killed the bike's power with this switch before the chain was able to cut all the way through my boot. Going off of this, boots are also very important. They keep your feet and ankles safe. Motocross boots are usually very rigid and stiff to keep the rider from breaking their leg or ankle.

This is not a picture of my motorcycle, but it is the exact same year and model. The kill switch can be seen on the left side of the handlebars as a red, square shaped button.

The novel I am currently reading which is also titled Motocross suggests that if you do decide to try this sport, you should try going slow for the first few rides and then periodically start pushing you and your bike's limits. It is also suggested that you try this sport using a 4-stroke bike. 4-stroke bikes are easier to control and have more bottom-end acceleration than a 2-stroke bike, which is what I usually ride. The only difference between these two bikes is their motor configuration. 4-strokes are meant for casual and trail riding. 2-strokes are for racing, cross country and jumping. 2-strokes are also much louder and more bore out than 4-strokes.

Question To Make You Think: Have you ever had a time where gear or a helmet had saved you from danger, or even your life? Post a story about it in the comments!


Shooting

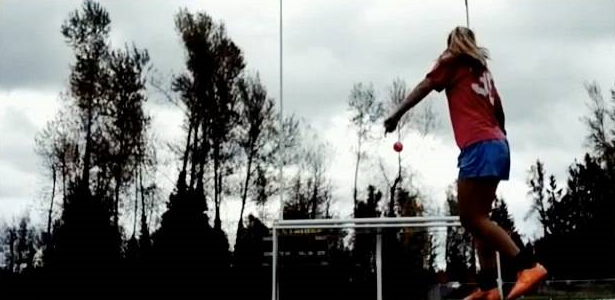
In Essential Soccer Skills, Bob Bridle shows and explains many individual skills. He says, "like dancers and singers, soccer players' bodies are their instruments, their means of performance and expression" (DK 60). Following this, one of the skills he teaches in the book is the outside hook shot. Within soccer games, you use many types of shots in order to score. I know many forms of hook shots, but the outside hook is by far my weakest. I decided to go out and practice this shot several times the way that my book had explained it. Bridle states, "for an out swinging strike, connect with the outstep, on the base of the ball" (96). Using this detail I focused on what Bridle was saying and focused on my form. After several tries, I was able to begin curving the ball more than I could before. I will continue to practice this shot, and use it in my soccer career.


He also shows a very similar explanation for the in swinging hook shot. He writes about how you hit the ball with the same placement on your cleats, but different area on the ball. On a regular shot you would hit the ball directly towards the middle of the ball in both vertical and horizontal directions. With a curve shot in swinging you strike the ball toward the lower outside quarter section of the ball. This will make it so the ball curves as you strike around it. I have pretty good experience with this shot but after practicing with some of the steps the book says, I found another way to complete this shot. This gives me a wider range of shooting ability for games. I intend to continue to improve my curve shot both inwards and outwards.

Bridle includes simple steps to a regular shot also. Commonly during games when I shoot the ball it goes over the crossbar. Bridle gives specific details about how to prevent this from happening. Though I get lots of input from my coaches about the way I shoot and how to improve, it is always good to get a unique perspective on how to do something. That's what this book includes. It shows me different ways to do the skills I wish to master. I will continue to use these viewpoints in my soccer future.
Saturday, November 29, 2014

Pitching

Pitching is an essential part of the game. Without good pitching a team will tend to struggle. Pitching has completely evolved over the years and is now extremely complex to the evolution of hitting. According to my book Splitters, Squeezes, and Steals, in the past, "The pitcher's elbows and wrists were kept stiff, and his main objective was to allow the batter to hit the ball" (Gentile 10). If the pitchers were to do this nowadays the final scores would be extremely high due to the fact that the hitters have gotten better.

Even though I haven't pitched a whole lot before I have been working on my pitching to add another element to my game. Uses my book I have gotten advice on how to throw certain pitches and when to throw these pitchers during  a game.

The first pitch that I've been working on is the fastball. Most people tend to think of the fastball as a pitch where you get the ball and throw it as hard as you can but it is much more than that. The fast ball is gripped by placing your index and middle finger on your throwing hands across the seams of the baseball. Your thumb is placed under the baseball. To throw a fastball you bring your arm straight to home plate to cause the ball to move straight. Fastballs tend to be thrown earlier in the count because it should be your most accurate pitch.

The second pitch I have been working on is the curveball. To get the ball to actually curve takes a lot of practice and experimentation. To throw a curveball you place your middle finger and index finger on the seam with your thumb underneath the baseball. To get the ball to curve you need to snap your wrist downwards at an angle before throwing the ball. The curveball is usually a pitcher's strikeout pitch and is used less often then a fastball because it tends to hurt your arm if you throw it repeatedly due to the awkward motion.

My last pitch I have been working on is the split-finger fastball (splitter). According to Roger Craig, who had a pretty good splitter during his career, said that the forkball, which is similar to the splitter, is pushed back as far as you can into your fingers while the splitter, "'is closer to your fingertips and you have your fingers higher on the ball. You can throw it a lot harder'" (Gentile 55). As shown in the picture you place the ball between your index and middle finger with your thumb on the bottom of the baseball. When you throw a splitter you snap your wrist downwards right before release to cause the ball to drop down. The splitter is also a strikeout pitch that deteriorates your arm if repeatedly used.

Q: Is there another pitch that you have heard of?
Citation: Gentile, Derek. Splitters, Squeezes, and Steals: The inside Story of Baseball's Greatest Techniques, Strategies, and Plays. New York: Black Dog & Leventhal, 2009. Print.

Training Dog Tricks

After living with dogs almost my whole life, I have learned they are very intelligent. So, I though it might be fun to teach my dog, Gracie, some new tricks. She already knows basic commands, like sit, stay, and lie down, so I decided to teach her something more challenging: roll over. To help me with this, I checked out the book 101 Dog Tricks by Kyra Sundance and her dog, Chalcy.

Sundance suggests you "start with your dog in a down position" (31). Then, "move the treat from his nose toward his shoulder blade while telling him to 'roll over.' This should lure your dog to roll on his side" (31).

Once your dog gets the hang of this, Sundance says to start introducing the hand motion. Continue to tell your dog to roll over, but instead of luring him with the treat, do a circle motion with your hand and reward with the treat after he has rolled over. (31)


I have attempted to teach this trick to Gracie before unsuccessfully. The reminders in this book that progress can be slow, and often frustrating, helped me realize that patience is the key to successful dog training (Sundance 12). If you have a pet at home, what have you found makes training successful?

Sundance, Kyra. 101 Dog Tricks: Step-by-Step Activities to Engage, Challenge, and Bond with Your Dog. Gloucester, MA: Quarry, 2007. Print.

Something to Focus On


If you're anything like me, you know that it's easy to run out of ideas for taking a perfect photo. That's why i picked up The Unforgettable Photograph by George Lange and Scott Mowbray. It's full of unique ideas for taking an amazing photo. 

Recently, I've been focusing on the idea of depth of field.  This is where you focus your shot on the closest subject, and in result the things farther back in the shot are blurred.  Because of this, depth of field shots are only good for certain things since they're meant to capture a specific object in time and not an entire picture of detail. Lange realized this through his work too, "i don't want pictures to be so blatantly about technique. There are times when it works, though"(168). You achieve a Depth of field shot by "first, selecting the widest possible aperture in the AV mode and, second, zooming in" (168). 


When i tried this idea I found that it works best with objects rather than people. When taking pictures of people you want to capture the moment as it is rather than try to pose it (26). This technique gives each photo a sense of professionalism which isn't always needed when taking shots of people. Which in contrast, always works out when taking a picture of any object, even a tree branch or a flower! Have you tried a depth of field shot? Can you prove me wrong? Does Depth of Field work well on people too?


Citation: 
Lange, George. The Unforgettable Photograph. New York, NY: Workman Publishing Company, 2013.