Pages

Showing posts with label Dang Lam. Show all posts
Tuesday, January 31, 2017

Cookie Monster


Cookie monster is my all-time favorite character on sesame street, his fun and outgoing personality captured my attention. His love for cookies made me love cookies.  Today I will be sharing with this easy and adorable cookie monster cupcakes! The ingredients you will be needing are:

·        6 cupcakes Paper liners
·        Regular Cupcakes baking pan: 2 1/2 x 1 1/4 inches
·        ½ cup on whole milk
·        Piping bag with tips
·        1 can of 16 oz. Container of vanilla Frosting
·        Edible eyes
·        cookies
·        11.5 oz. of Cake Mix
·        1 egg
·        blue food coloring
·        1/3 cup of Vegetable oil


Like always, I made the batter and placed it in the oven. When it was ready I took it out and started decorating. I started off by tinting the can of frosting with blue food coloring. I placed the blue frosting inside the piping bag with a start tip.  Generously covering my cupcake with blue swirls of frosting to symbolize the fur of Cookie Monster (Tack 124). Furthermore, Karen Tack emphasized the importance of making the frosting messy by saying, “To really get the fur of Cookie Monster, swirl the frosting in no particular order, get it everywhere to make it more realistic” (Tack 124). Using her technique, I grabbed the piping bag and squeezed it while moving my hand all over the cupcake without going in any pattern. Then, using a knife I cut a line at the bottom of the cupcake to create the mouth of Cookie Monster. I placed a cookie in the month of Cookie Monster because, duh, Cookie Monster loves cookies. Finally, I placed two edible eyes at the top of the cupcake, and honestly after placing on the eyes, my Cookie Monster became an old man. It didn’t really look like Cookie Monster anymore but a weird man. However, my friend said that it was cute and adorable.


That’s it! It is honestly so simple and doable! Overall, I had a really great time not only making the cupcakes but also eating them. They turned out way better than I expected. I brought these cupcakes over to my little cousins and they absolutely loved them! I will surely make these cupcakes again in the future! I am so shocked that I was able to make Cookie Monster, this has been a great achievement.


Question: Who's your favorite character from sesame street, and who would you like to try to bake on a cupcake?


 Richardson, Alan, and Karen Tack. Hello, Cupcake! Boston: Houghton Mifflin, 2008. Print.         

Pastel Cupcakes

Today, I will be making pastel cupcakes. If you’re in a rush and need something fast and sweet to devour then these cupcakes are perfect. The ingredients you will be needing are:

·        6 cupcakes Paper liners
·        Regular Cupcakes baking pan: 2 1/2 x 1 1/4 inches
·        ½ cup on whole milk
·        Piping bag and tips
·        3 cans of 16 oz. Container of vanilla Frosting
·        A whisk
·        An Oven
·        11.5 oz. of Cake Mix
·        1 egg
·        Red, blue, green, and yellow food coloring
·        1/3 cup of Vegetable oil

      
First, I made the batter and placed it in the oven. After making the cupcakes, I divided the frosting into 4 small microwaveable bowls. Karen Tack, author of Hello, Cupcakes, said to buy store-bought frosting to produce a firm, shiny, glistening, and smooth cupcake (Tack 138). I tinted each bowl a different pastel color with food coloring. Karen Tack explains the importance of covering up the frosting by saying, “Cover the frosting with plastic wrap until ready to use to prevent them from drying out” (Tack 139). Her techniques helped me significantly, last time when I was waiting for my cupcakes to cook, I tinted my frosting; However, I left it out without any cover and my frosting hardened and I was unable use it.


I microwaved each bowl for 10 seconds and stirred it until it became the consistency of light whipped cream or Elmer’s glue. If it’s too thick, stir and microwave for 10 more seconds (Tack 139). Quickly, I held the cupcake by its bottom and dipped it into the melted frosting and lifted the cupcake and allowed the excess frosting to drip off. I popped all the bubbles on the cupcakes and fixed spots that were weird and funny. Afterwards, I waited about 2 minutes for the frosting to harden, and dipped it back into the frosting. The second layer looked way smoother than the first layer. Later, I took a piping bag and filled it with white frosting and applied simple designs on the cupcakes, so it wouldn’t distract the attention away from the pastel frosting.  
Final Product


------->


My friends said they look absolutely adorable and tasted great! 


Question: What color would you use if you were to make these cupcakes?
                  Have you ever tried dipping your cupcake into melted frosting before?

 Richardson, Alan, and Karen Tack. Hello, Cupcake! Boston: Houghton Mifflin, 2008. Print.         


Gotta Catch’em All

Today I will be making Pokémon balls cupcakes. Can you believe that Pokémon has been around for 20 years? As a child my favorite game of all time would be Pokémon.  I grew up with mainly boys in my household, so I played games that my cousins would love to play and I would be so excited to catch Pokémon’s and have competition with them. Today I will be reliving my childhood by making these cute, doable cupcakes. The ingredients you will be needing are:

·        6 cupcakes Paper liners
·        Regular Cupcakes baking pan: 2 1/2 x 1 1/4 inches
·        ½ cup on whole milk
·        Piping bag with tips
·        1 can of 16 oz. Container of vanilla Frosting
·        A whisk
·        An Oven
·        11.5 oz. of Cake Mix
·        1 egg
·        Red food coloring
·        1/3 cup of Vegetable oil


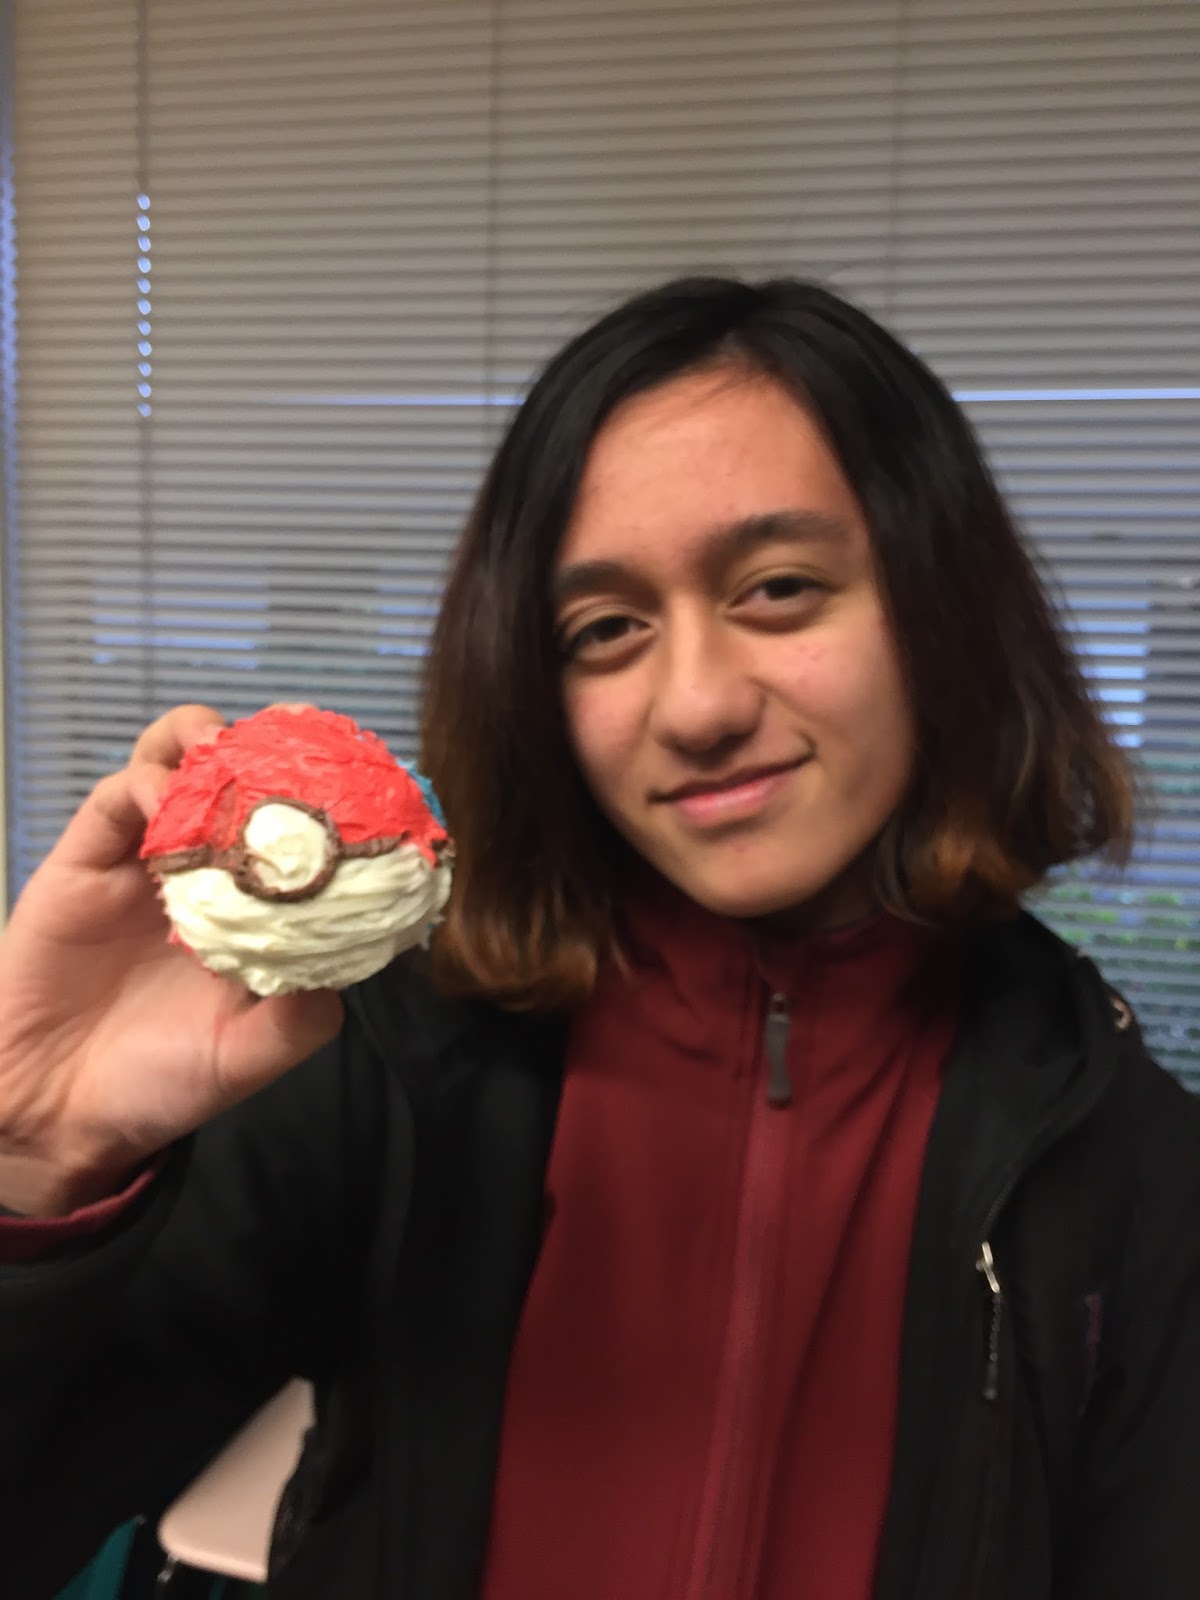
Like Before, I made the batter and placed it in the oven. After 25 minutes I took the cupcakes out and started the decoration. Karen Tack emphasized the importance of having the right texture of frosting by saying, “Make sure your frosting is at room temperature; it will have a better texture and will be easier to handle, and always stir the frosting before using it” (Tack 10). I took her advice and placed the frosting on the kitchen table for a day, and stirred it well before using it. First, I took half of the frosting in the can and made it red with red food coloring and let the half remain white. I took the red frosting and spread it on half of the cupcakes, and i did the exact same thing with the white frosting. I removed any excess frosting and smoothed the top (Tack 10). 

Then, I put chocolate frosting inside a piping bag with a small hole tip. Where the red frosting and the white frosting meets, I put a line in the middle and a circle in the middle of the line to create the Poké ball design. It might look sloppy and messy at first, but everything will eventually come into place.Then, I get another piping bag but this time I have white vanilla frosting inside. With the same small hole tip, I fill the circle in the middle of the line with white frosting to imitate the poke ball design.


--------------------->


Overall, they look so adorable even if it’s a little messy! My friends said it was tasty and the design was beautiful! I really enjoyed making these cupcakes and will surely make it again in the future!


Question: Did you play Pokemon when you were young? If so, what Pokemon was your favorite? 
Will you ever try to bake these cupcakes?

 Richardson, Alan, and Karen Tack. Hello, Cupcake! Boston: Houghton Mifflin, 2008. Print.         

Wednesday, December 28, 2016

Christmas Tree Cupcakes


        Christmas and cupcakes are two of my favorite things, so what could be better than combining them in these delicious Christmas trees cupcakes? Karen Tack, author of  Hello, Cupcakes said, "This Christmas Tree cupcake may appear a little daunting, but they are actually simple to make" (Tack 150). Truth to be told, it was way harder than I expected. However, these Christmas tree cupcakes are one of the best choices to contribute to Christmas parties. The cupcakes are adorable and sweet; they will certainly not leave you disappointed. 


Material:

§  11.5 oz. of Cake mix
§  4 egg whites
§  1/3 cup of oil
§  1 cup milk  
§  Green Food coloring
§  Large Mixing bowl.
§  7 cupcakes paper liner
§  Sprinkles, Stars
§  Store bought frosting

Steps: 

          Like before, I preheated the oven to 350 degrees. I mixed 11.5 grams of cake mix. I added ½ cup of milk, one egg, 1/3 cup of oil and cake mix, I mixed it until it became firm. Then, I placed the batter into the paper liners and placed in the oven, I waited around 25-30 minutes and took it out of the oven to let it cool.


        After, I tinted ½ cups of the vanilla frosting green and let the other half remain white. I distributed the white frosting on top of the 7  cupcakes to symbolize the snow. The frosting didn’t have to be pretty but quick and simple, it is just used to enhance the characteristics of the Christmas tree. I applied the store bought white frosting onto the surface of the cupcake, this way, it produces the cupcakes to look more sophisticated and cheerful when the Christmas tree is on top (Tack 152). After applying this technique, it definitely enhanced the characteristics and colors of the Christmas trees.


          Furthermore, I added the green frosting to a Piping bag with a large star tip (Karen 152). When I was putting the star tip inside the piping bag, I realized that I actually bought the wrong star tip size, the base of the star tip was too big and it didn’t fit the tip of the bag. I had to make it work by cutting down the bag size, however, it didn’t work as well as I thought it would have. The large star tip wouldn’t stay in place and kept moving inside the bag, causing the shape of the star to be undistinguished. 


       Lastly, Karen Tack, author of Hello, Cupcakes, explained the techniques on how to get the perfect Christmas trees. She said, “ Move the piping bag in a circle around the outer edges and work your way to the center of the cupcake, releasing pressure gently when you reach the center to leave a nice frosting peak” (Tack 156). Her instructions seemed easy and doable; however, it wasn’t. I had a really hard time pressing the piping bag and moving it in a motion to form the Christmas trees. I think it was mostly the fault of me not buying the right bag and also how inexperienced I was. Continuing on with the procedure, I added a star to the top and little tiny dots to represent the ornaments. The sprinkles once again made the cupcakes look more pleasing and pleasant than it actually was.

I failed...
My only good one.


         Lop sided, ugly, malformed are the characteristics of my Christmas tree cupcakes. This experiment was a total fail, but I still had fun making it. The cupcakes wasnt very pleasant to look at, but it was still delicious. Out of the 7 cupcakes, I only managed to make the Christmas trees on four of them. I will continue to practice, and will definitely be able to get it right next time!


Final Product


Question: Have you ever used a piping bag before? If so, how did it go?
If not, have you ever tried to make Christmas treats for a party or would like to in the future?


            Richardson, Alan, and Karen Tack. Hello, Cupcake! Boston: Houghton Mifflin, 2008. Print.           


Wednesday, November 30, 2016

Hello, Cupcake!


Today, I will be sharing with you my easy and simple techniques for baking cupcakes. Out of all my hobbies, I would have to say that baking would be at the top of my list. The days where I want to be productive, instead of binging on Netflix shows, I would choose to bake. Baking is tremendously pleasurable and it helps to get my mind off of unwanted stress. You are probably wondering why I chose cupcakes out of the huge selection of baked sweets. Well, cupcakes are my favorite dessert. If you take me to a party where there are cupcakes, I will surely be the first in line. The sweet, creamy frosting and the delicious, moist cake partner up to make cupcakes a popular favorite among people around the world.

Ingredients:

·        7 cupcakes Paper liners
·        Regular Cupcakes baking pan: 2 1/2 x 1 1/4 inches
·        ½ cup on whole milk
·        Large Mixing Bowl
·        16 oz. Container of vanilla Frosting
·        A whisk
·        An Oven
·        2 different cans of sprinkles
·        11.5 oz. of Cake Mix
·        1 egg
·        Red food coloring
·        1/3 cup of Vegetable oil 
       
             Steps:
        The first step in making the cupcakes is to preheat the oven to 350 degrees. Karen Tack, author of Hello, Cupcakes, explains the importance of preheating an oven by saying, “Food also cooks faster in a preheated oven – you've got the right temperature from the get-go and your dish can start cooking immediately and properly” (Tack 3). After listening to her advice, I applied this to my procedure and it worked very efficiently.

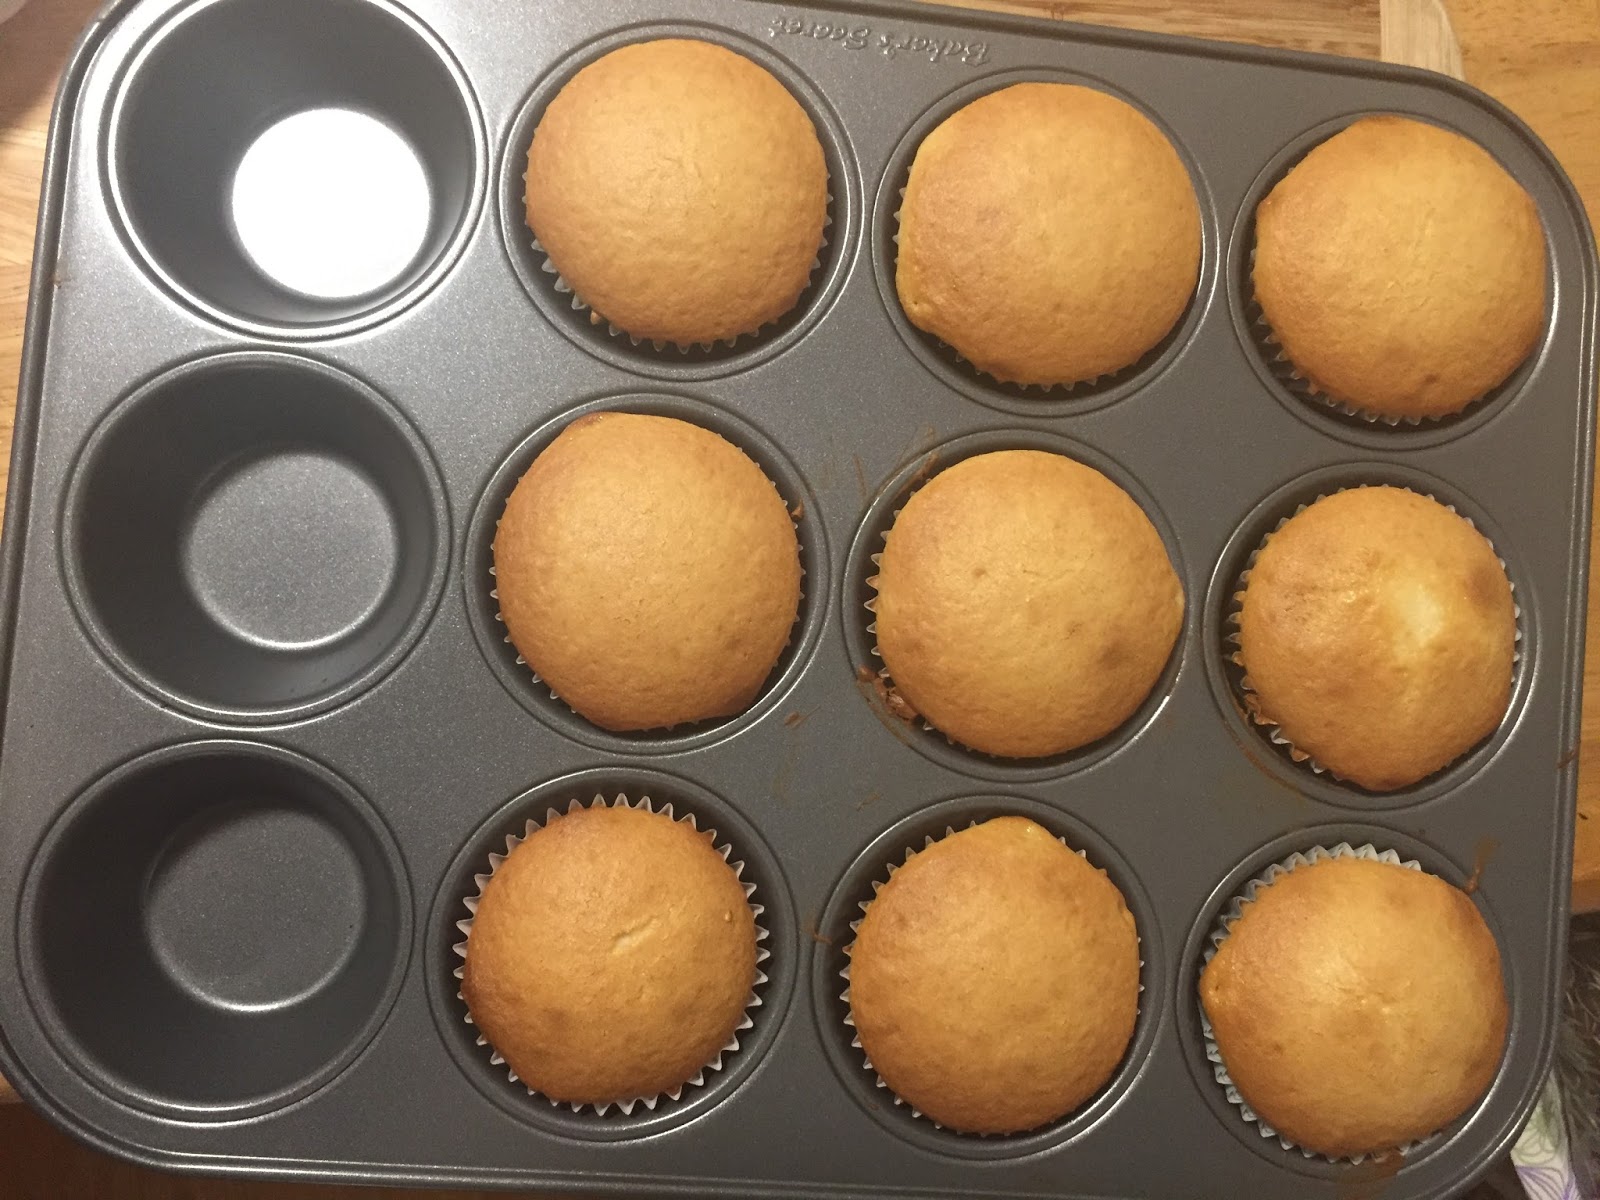
         After, I lined 8 cupcake cups with paper liners. I measured out 11.5 grams of cake mix. I added ½ cup of milk, one egg, 1/3 cup of oil and cake mix into the mixing bowl. I mixed until the batter became firm. Then, I poured the batter into the cupcake cups with the paper liner, and placed it in the preheated oven. After 25 minutes, i took out the golden brown cupcakes from the oven. Making the batter made my kitchen and floor very messy. The batter got all over my kitchen floor, on the counter, my shirt and hands. Even though it got really chaotic, I had an enjoyable time making the batter.


                     I waited 25 minutes until the cupcakes had fully cooled down. In the book Hello, Cupcake! Karen Tack emphasized the importance of waiting for the cupcakes to cool down fully by saying, " before putting on the frosting wait for it to cool down, because we do not want the frosting to melt" (Tack 2). I applied this tip to my procedure and my frosting stayed sturdy. while waiting for the cupcakes to cool, I tinted the store bought vanilla frosting pink with red food coloring. Store bought frosting does well to tinting, making it simple to create vibrant colors (Tack 1). When I applied the method, I was very satisfied with the gorgeous pink color that I received. Don’t be a klutz like me and eat almost half of the frosting while I was waiting. I suggest that after you are done tinting the frosting, STEP AWAY FROM THE FROSTING.


    Finally, I frosted my cupcakes with the pink frosting. Whether or not your cupcakes were frosted, you will want to frost your cupcakes (otherwise, they are just muffins). Lastly, I sprinkled the sprinkles all over the cupcakes. Adding sprinkles helps to hide any imperfections and adds color and texture to the cupcakes (Tack 2). This method was like my Christmas miracle. When I applied the frosting, it looked really unpleasant and messy. But, after applying the sprinkles, the cupcakes looked somewhat decent and were more mesmerizing than before.


Final Product
Enjoy! Don't forget to share them with friends.

        Overall, I was really satisfied with the end result. I felt very proud of myself for making it alone. I really enjoyed getting messy and baking my heart out. My friends really enjoyed the cupcakes and thought they were good. They were utterly shocked that I took the time to actually bake cupcakes, since I am pretty lazy. When you’ve got a reason to celebrate, bring out the wow in the occasion with cupcakes. Baby showers, family reunions, summer garden parties, even weddings - are all great opportunities to show off your cupcakes prowess. Happy baking!

Question: Have you tried baking cupcakes before, if you did, how was the experience? Also, what is your favorite frosting color?

Richardson, Alan, and Karen Tack. Hello, Cupcake! Boston: Houghton Mifflin, 2008. Print.