Pages

Showing posts with label Baking. Show all posts
Monday, January 29, 2018

Blueberry Cake


                                                          Blueberry Cake

Now this is an al-time favorite of mine. You can make this at any point whether it be for pleasure, family event/gathering, or even a party.

I would have made the mixture into cupcakes but since that would have taken longer, I decided to make it into a cake. The recipe came from a website that I found as I was looking for a recipe for dinner. I saved the page and remembered it a few days ago. Since I had also made the brownies for my mom and brother, I had decided to make a something for my dad when he goes to work. I decided on doing the blueberry mixture recipe.

Recipe:
- blueberries (frozen)
- 1 cup of water
- 1/3 cup of butter
- 3 eggs
- cake mix

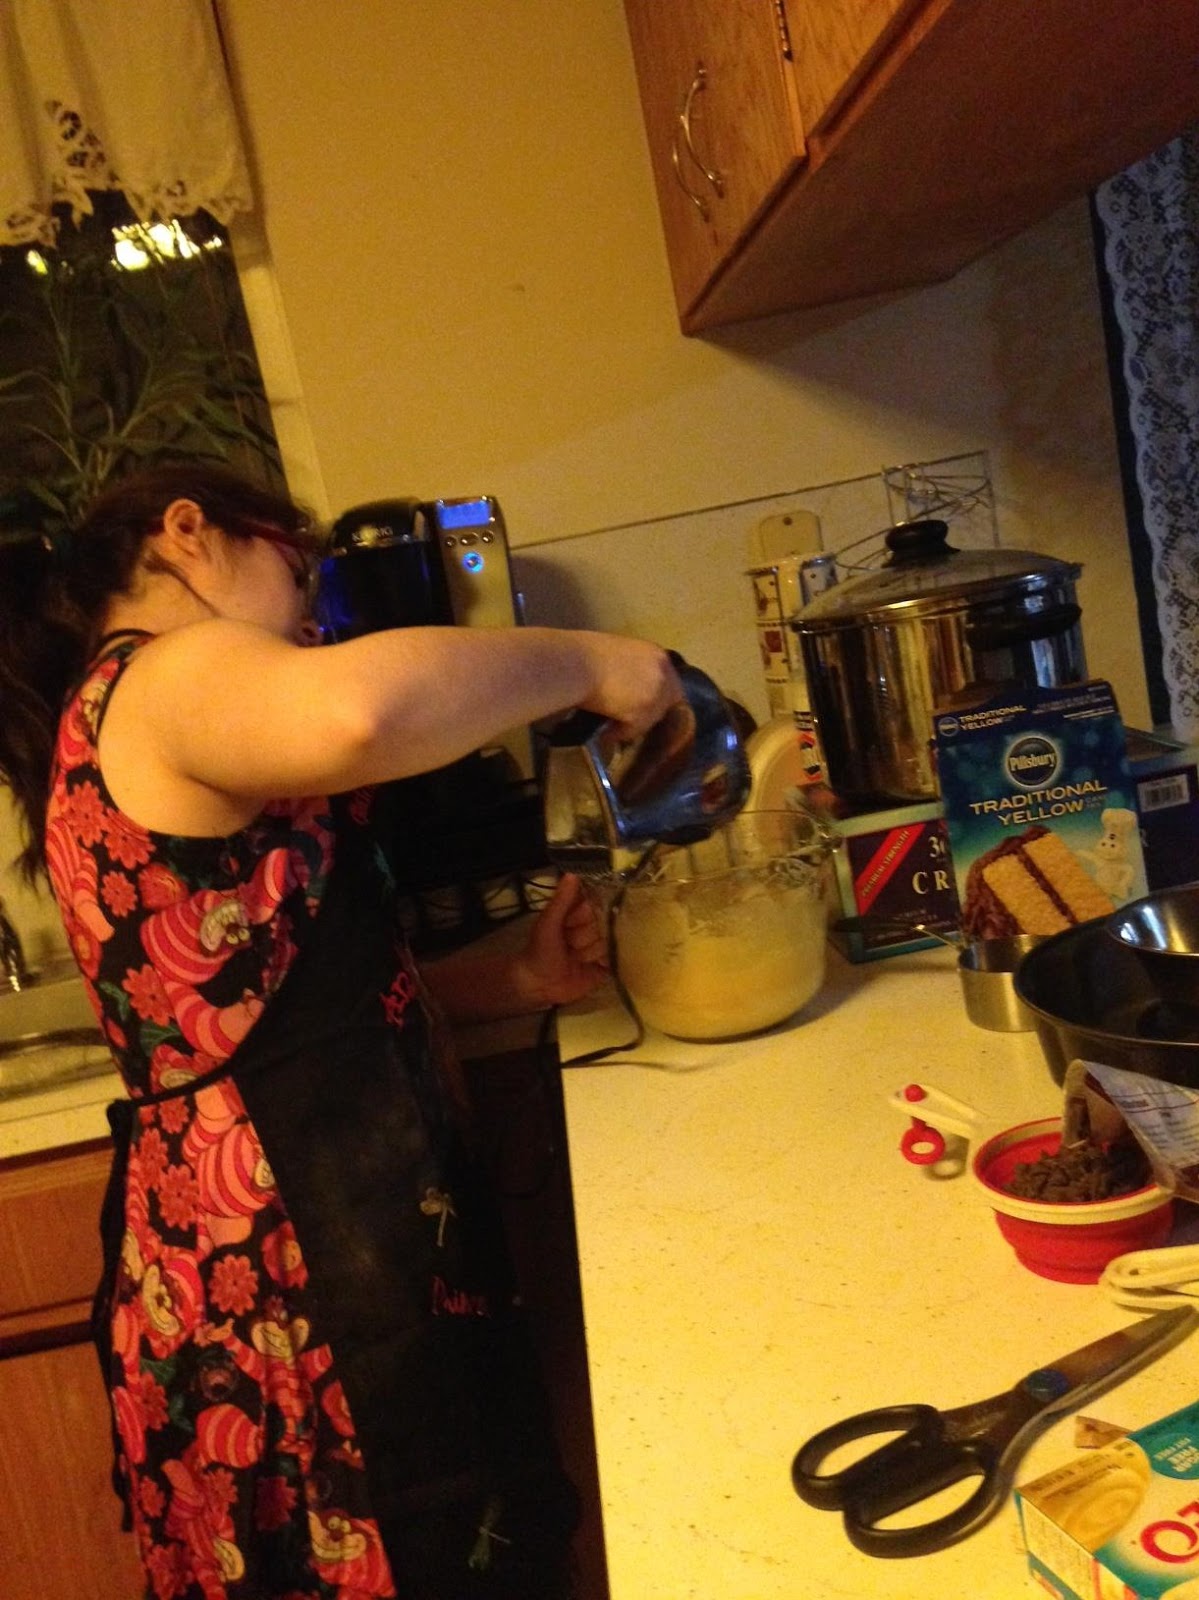
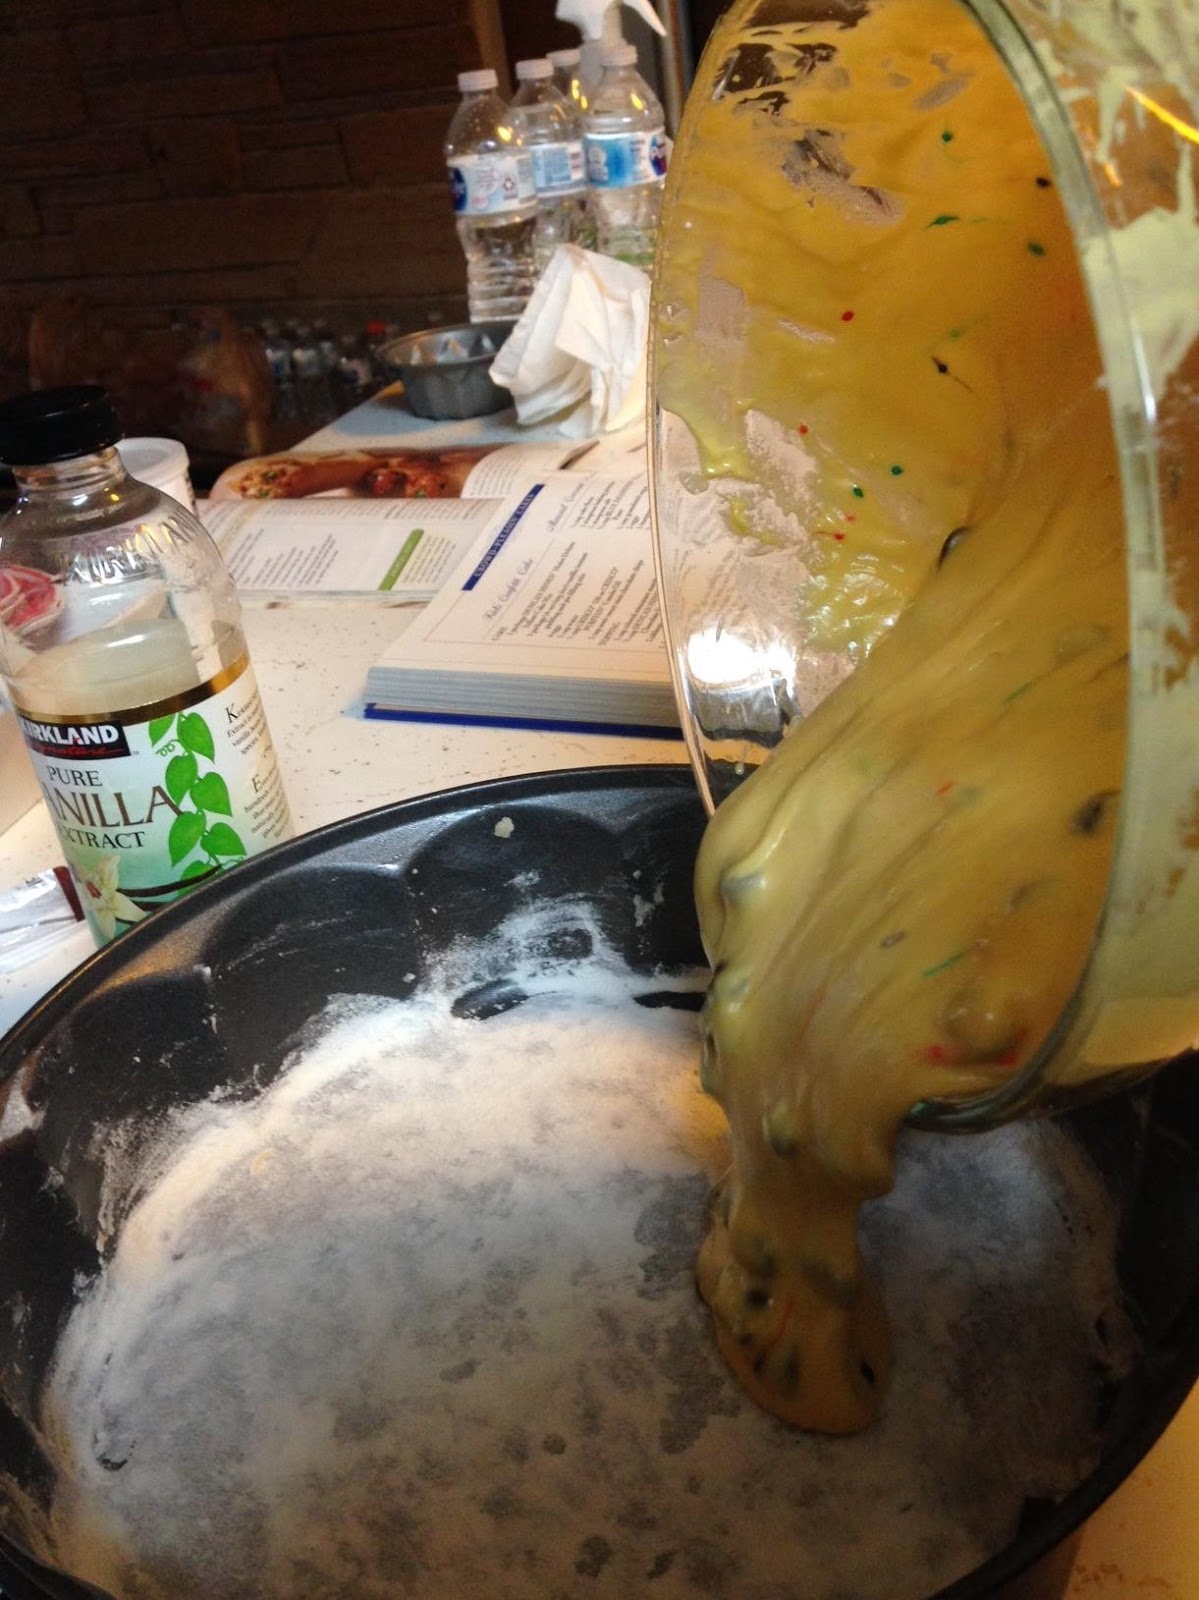
First of all you preheat the oven to 325 degrees if you have a dark pan. if you have a light pan then you preheat it to 350 degrees. You grease the pan so it wont stick to it. You put the cake mix, water , butter, and eggs into a mixing bowl and mix all of it together. You put the blueberries in a bowl and heat them for around 25-30 seconds. After you heat the blueberries and the mix is done you add the blueberries to the mixture. Be very careful because you don't want your cake mix to turn blue/purple.

After you're done, then you put it in the oven for about 30 minutes. Now be careful because you don't want your cake to stick to the pan. Wait for around 10 minutes so it cools. After its finished cooling off, put it on a pretty table center and let your family or guests start to enjoy it.


Now here are some questions I hope you van answer:
What would have been better to use, frozen blueberries or fresh blueberries? Would the cake have turned out differently?


Sources: 
"Betty Crocker Supermoist Cake Mix, Butter Recipe Yellow, 15.25 oz." Walmart,
     www.walmart.com/ip/
     Betty-Crocker-Supermoist-Cake-Mix-Butter-Recipe-Yellow-15-25-oz/20511486.
     Accessed 29 Jan. 2018.

"Cake Mix Blueberry Muffins Recipe." Six Sisters' Stuff, 14 Mar. 2012,
     www.sixsistersstuff.com/recipe/2012/03/cake-mix-blueberry-muffins-recipe/.
     Accessed 29 Jan. 2018.

Brownies


                                                                     Brownies

Everyone knows that making brownies is an easy thing to do. Whether it be for a party or just to enjoy them at home. We all pretty much know how to make brownies. I'm here to gonna give the recipe for the brownies, and how to make them.

Recipe:
- 3 eggs (And/or egg whites or egg substitution)
-1/3 cup of oil
-1/4 cup of water
-brownie mix


Now see first of all we preheat the oven to 325 degree. While we let the oven start to heat up, we start to put all the ingredients into a bowl mixer. After the ingredients are all mixed together and leave a smooth texture to the mixture.

You put it in the oven for around 30 minutes. Now be careful and don't let the brownies stick to the bottom of your pan.

Now I know this blog may seem less interesting but it's to help anyone incase they want to do something like this. Maybe for the fun of it, you can even add some type of color to the brownies. Add sprinkles of frosting to it to make it sweeter.


Now a good question I have is whether or not I should have used the egg white. what type of texture would it have given me? Would it have turned out differently?

Leave a response below in the comments:
Would have using the egg whites been better? What would it have done?

Sources: 
"Betty Crocker® Brownie Mix Fudge Family Size 18.3 oz Box." Walmart,
     www.walmart.com/ip/Betty-Crocker-Brownie-Mix-Fudge-Family-Size-18-3-oz-Box/
     10311382. Accessed 29 Jan. 2018.
Friday, January 26, 2018

Sago Coconut milk dessert with mini tapioca

Sago Coconut milk is a traditional Chinese dessert that is made with a boiling process of the mini tapiocas, milk, and coconut cream together. This delicacy is super silky to taste and has a fresh and creamy smell of coconut. With the chewy tapioca, it makes the perfect pair. This dessert also comes in a variety of flavors. For example you can add mango, taro, red beans and much more to customize it. Today I will be teaching you guys how to make  a coconut flavored one.

Ingredients: 1 can of coconut cream, 6 cups of milk, 1 cup of mini tapioca, and 1/2 cup of sugar
Steps: First boil the tapiocas until they turn clear and rinse them under cold water and strain. Let it cool, then in a pot, bring your milk, coconut cream and sugar to a simmer, making sure that the heat is low. Once everything is combined, add the tapiocas and mix well.


When straining any ingredients, use a strainer or sift to ensure all the water is removed (Paul 227). This is important in the process of making anything because it ensures that there are no excess liquid in your ingredients. During the process of boiling, make sure  to choose a pot with a thick bottom. "Choose a heavy-based pot, usually for making sauces or liquids" (Paul 214). I learned that this is important because a thin bottom can lead to burning to the substance and can ruin the taste and appearance of you end product.
This dessert can be served cold or hot. Also they can be accessorized with different toppings such as beans, ice cream, mochi, and also whipped cream. To decorate mines, I sliced up some strawberries and placed it on top to add some color.
What are your guys' favorite traditional dessert?
Tuesday, January 23, 2018

Making a "healthy" version of strawberry milkshake

       Who doesn't love a good old milk shake. Although sometimes they may be over priced, today I will teach you how to make your own milkshake at home. This is a much healthier alternative than store bought ones since store bought ones may contain preservatives, artificial sweeteners and flavoring.
This milkshake is totally customizable. You can add your favorite fruits or syrups into your milk shake to suit your taste. For example, you can add bananas, blueberries, and raspberries or chocolate syrups. Also you can add your desired amount of sweetness and the amount of liquid to adjust to the consistency you like. Today I will be making a strawberry milkshake.

Ingredients: 6 Fresh strawberries, 1 tablespoon of honey, 1 cup of milk and 1 scoop of strawberry ice cream (For I serving)


This is super easy to make, you put everything in your blender and just blend away. "Blenders come in many different forms, and there are varies models out in the market" (Paul 15). I learned that having any types of blenders will do the same job. But when you consider how often you use a blender and the purpose you use it for, you will know which types suits your own need. For example my blender is for smoothies and beverages only, so it is small and comes with a lid so it can be a to go after you finish blending it.
Also having a pair of fruit knife would be handy for cutting out the stem of the strawberry. "A smaller version of the chef's knife, this is ideal for neat, precise knife work" (Paul 12). This part is not only handy but also safe too. You don't want to use a big knife for a strawberry and accidently cut yourself.
   
I would consider this milk shake to be healthy besides from the ice cream. Using a natural sweetener and fresh fruits is a really important step towards making your life style much healthier than just using frozen fruit and sugar. Lastly I hope you all can try to make your own milkshake using healthy ingredients.

What are your guys' favorite types of milkshakes and do you guys like fruity milkshakes or sweet plain ones such as chocolate and vanilla?
Monday, January 22, 2018

Effortless and Easy No-Bake Cheesecakes

Delicious Mini No-Bake Cheesecakes


I decided on making this dessert for my next blog post because I had made more savory dishes previously and thought it would be a good idea to switch it up! This recipe caught my eye because the vibrant colors from the fresh berries made the dish look very appealing. The dish was fairly easy to make because there was no baking time involved, however there was time that you had to chill certain parts of the dish; about 40 min total. The cheesecakes involved the components of a graham cracker crust, a sweet cream cheese layer, fresh berries, more cream cheese and topped off with even more berries!

The way I served them to my family were in cute little mason jars, the perfect serving size. Rachel Hollis had mentioned in her book that "serving a classic dish in small individual portions is an easy way to reinvent your favorites" (Hollis 15). I tried to make the dessert presentation even more adorable by adding a drizzle of raspberry liqueur on top of each cheesecake to compliment the fruit flavor already in the dish. This dish was so simple but made me realize like Rachel had said you can do anything beautifully with style (Hollis 5).  


What kind of cheesecake do you guys prefer? 


Hollis, Rachel. Upscale Downhome: Family Recipes, All Gussied Up. Thomas Dunne Books, St. Martin's Griffin, 2016.  
Sunday, December 31, 2017

Making Vanilla Meringue Cookies


Meringues are an French dessert that only consists of 3 ingredients. Egg whites, sugar and a tiny bit of vanilla extract. This dessert is a light, delicate cookie that crunches immediately after you put it in your mouth. I remembered the first time I tried this delicacy, my taste buds were dancing around. I never knew there was a cookie that tasted so good and was so easy to make. I’ve been wanting to make it after I got a taste of it in my culinary arts class, but due to my busy schedule and the amount of school work, I had to make this during my break. I thought this would be a good dessert to make for my IRP. So today I made these delicate cookies and I am going to teach you all how to make it too.

Ingredients

4 egg whites                  2/3cups of fine white sugar               1tsp of vanilla extract

Steps:

Related image


“Ensure that the bowl you use when whisking is scrupulously clean. The smallest amount of oil, grease or egg yolk will contaminate the eggs and they won’t fluff up, this also applies to the whisk you are using” (Paul, Treuille 165). This is truly important because many people will think a little bit of yolk and grease won’t affect the mixture, but they are important to avoid because they can really affect the egg white, causing it not to form into a meringue. A way I like to separate the egg whites from the yolk is to use the shell. It can be also done by hand but I find that not as sanitary. “Crack the egg over a bowl, tip the yolk back and forth between the 2 shell halves, allowing the white to fall into the bowl below (Paul, Treuille 159).
Figure 2
Figure 1


As you can tell by the ingredients, this cookie is really easy to make. All you need to do is add the vanilla to the egg whites and start beating. After one minute of beating, when the egg white starts bubbling, add the sugar gradually and start beating the meringue on high speed. After 5-6 minutes, check to see if the meringue has reach the stiff peak stage. After that you can put it in a pastry bag       and start piping.


This is the point where you can get super creative. You can add food coloring and sprinkles to make your cookies more appealing, also you can pipe different shapes and sizes of cookies using different piping tips. In figure 2, I included different shapes of meringue cookies you can do. To make my cookie simple, I did not add any food coloring and I choose a round tip for this. Based on different techniques you use you can create different shapes using the same tip. In picture 1 above, I made a tear drop shape and a dome shaped cookie.

What are your guy’s favorite type of cookies and why? Which shape of the meringues do you like from figure 2?
Tuesday, December 26, 2017

Strawberry and Cream Sponge Cake (Christmas Edition)

For Christmas, I've decided to make a strawberry and cream sponge cake. The cake is very common in Asian culture to have during Christmas, especially for Japanese people. This dessert is made of a soft and airy sponge cake base, sandwiched with freshly whipped strawberry cream and some fresh-cut strawberries. For my cake, I named it Strawberry Wonderland.🍓☃🏘

Ingredients:                                              Sponge cake:        Whipped Cream:

4 eggs🥚            3/4pintof heavy whipping cream
70grams of sugar                  1/4cup of fine sugar
40ml of milk🥛          1/4cup of strawberry puree 
30ml of canola oil 2cups of 🍓(filling&décor)
1tsp of vanilla extract  
Meringue and egg batter
 50grams of all purpose flower
50grams of corn starch

Steps:

1.To make the sponge cake, first combine the egg yolks, milk, oil, flour, corn starch, vanilla, 1/4 of the sugar and whisk until smoothed. (Set aside for later use)
2.Using an mixer, whisk the egg whites on high speed for 5min or until medium soft peaks form. When whisking, add sugar gradually after the egg whites become frothy.
3.Gently fold in the two mixtures in 3 parts until combined. "Fold"-"To gently mix a light mixture into a heavy one, avoiding knocking out the air"(Paul 247) This had help me understand the importance of folding gently instead of just whisking till combined. It really makes a difference in the end result of the sponge cake. From being stiff to light and airy.
4.Pour batter into a round baking pan and bake for 45min in a 300 degrees Fahrenheit oven.
5.For the whipped cream, blend strawberries into a puree and strain the seeds with a sift.(set aside)
6.In a bowl, whisk the whipping cream and sugar together until it becomes stiff. Whisk in the puree.
7.Slice the cooled cake equally into two. Spread a layer of cream on the cake and place a layer of strawberries on to the cream and cover the strawberries with another layer cream. Finally, placing the last piece of sponge cake onto the cream.
8.Frost the cake and decorate it with the rest of the strawberries and cream.(put in fridge overnight)
"put your chosen tip in pastry bag then fold over tip of the bag to form a lip that sits over your hand and fill the bag with chosen frosting"(Paul 188) This has help me to fill the pastry bag quicker and made the whole process of decorating easier.
Lastly I want to wish everyone a merry Christmas! I hope you all get a chance to try this cake❤

What r your guys favorite type of cake and what filling do you like in it?


Thursday, November 30, 2017

Tips and Tools That You Will Need for Baking


Tips and Tools That You Will Need for Baking


To many people baking seems like an easy task, but in reality, baking is all about math, measurements, and preciseness. When I started baking in 6th grade I had no idea to use certain equipment’s for baking. This is a very common mistake that people make when baking. By doing this, your finished product will certainly not taste right or will not look like what it should look like. Today I am here to inform you about tips and the purpose and the importance of tools in baking.


In the picture on the left; spatulas, whisks, scoops, sift, baking paper and cupcake liners are included. These are some of the basic tools that you will need for baking. They are designed for the baking process and each have their own use. First of all, whisks help to blend the batter and incorporate air into the mixture, as air is an important factor for baking. The rounded wires helps to smooth out the batter and the hollow in between allows air to be mixed with the batter. A spatula is also a handy tool when it comes to baking. It helps us fold in ingredients without easily breaking the air bubbles that was created during the whisking process. The silicon texture grabs anything from the bottom of the bowl and help incorporate the ingredients evenly. Next the scoop was for scooping/measuring out a good proportion and serving size of the batter or dough. Lastly a sift, it’s main goal is to strain your dry ingredients or liquid that may have large chunks in it. As the authors said “you should have a fine strainer for baking and straining stocks and sauces,” (Paul, Eric 14). This will improve the quality of your finished product.


Text Box: TIPS: Fold your parchment paper in fourths and place on ¼ of the pan. According to the picture, cut outline of the outer circle and you will have the perfect shape to line your baking pan.

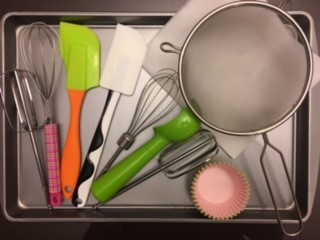
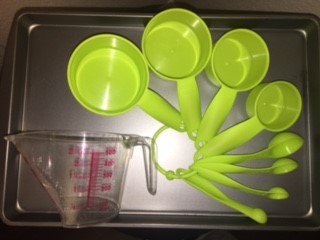
                 The most important part of baking is measuring out your ingredients precisely. By having a set of measuring spoons and a measuring cup can help you in lots of ways. By doing this, you will increase the quality of your finished product. To measure correctly, you use the spoon size according to the recipe and fill it to the top. To be precise, you can take a knife and level off the top
                                    Text Box: I learned from the book the importance of equipment’s in the process of baking and how they work together in order produce the best outcome of your masterpiece. How does the understanding of the importance equipment affects the outcome of your product?


Kids Confetti Cake

                                      Kids Confetti Cake

Everyone may believe that baking or cooking in the kitchen may be had. In reality it's actually very simple unless you are doing something very complicated. I only complicate myself if there is a celebration. Parties are the time to show your baking skills. Here's a great recipe for a day when you and/or your siblings can do to show your skills to the family. 
The recipe is: 
Cake
- 1 package of yellow cake mix
- 1 package (4-serving) vanilla instant pudding and pie filling mix
- 4 eggs
- 1 cup of water
- 1/2 cup of canola oil
- 1 cup semi-sweet mini chocolate chips

Topping
- 1 cup of colored miniature marshmallows
- 2/3 cup chocolate frosting
- 2 tablespoons semi-sweet mini chocolate chips

Once you have everything ready you preheat the oven at 350 degrees Fahrenheit. It takes only a few minutes to make the cake mix. To make it you have to combine the cake mix, pudding mix, eggs, water, and the oil. You have to beat it at medium speed.


The difference between mixing and beating is a great one. Mixing means that you add a few ingredients at the time and combining them lightly. Beating is more intense, it requires a whisk or an electric mixer. Beating is used for cakes and toppings, while mixing it to make everything smooth.

After you beat it for 2 minutes you stir in a cup of chocolate chips. You grease and flour a baking pan. It can be any one that you choose as long as the cake will look good,  You pour it into the cake pan. You put it to bake for 40-45 minutes or until the toothpick that is inserted comes out clean.


Now for the topping, you immediately arrange marshmallows evenly over hot the cake. You place the frosting in a microwaveable bowl for 25-30 seconds, maybe even less. You stir it until it's smooth. You drizzle it evenly over the marshmallows and the cake.

Now in the book it says, "Use a spoon or fork to drizzle melted chocolate over cookies, bars, cakes and breads" (6). This means that you slowly put the chocolate on the cake and marshmallows, which is what I did and it worked out greatly. It also says that you can put the chocolate in a Ziploc bag and cut off a corner to squeeze out the chocolate in a pattern if you want to (6).

Now this is how the cake turned out. It looks great and tastes great. I hope you all try it out!


Which way do you guys believe would be better to drizzle the chocolate: with a fork/spoon or a plastic baggie?

Ross, Peter Dean, illustrator. Favorite Brand Name Bake Sale Cookbook. Louis
     Weber, 1997.


Tuesday, January 31, 2017

Cookie Monster


Cookie monster is my all-time favorite character on sesame street, his fun and outgoing personality captured my attention. His love for cookies made me love cookies.  Today I will be sharing with this easy and adorable cookie monster cupcakes! The ingredients you will be needing are:

·        6 cupcakes Paper liners
·        Regular Cupcakes baking pan: 2 1/2 x 1 1/4 inches
·        ½ cup on whole milk
·        Piping bag with tips
·        1 can of 16 oz. Container of vanilla Frosting
·        Edible eyes
·        cookies
·        11.5 oz. of Cake Mix
·        1 egg
·        blue food coloring
·        1/3 cup of Vegetable oil


Like always, I made the batter and placed it in the oven. When it was ready I took it out and started decorating. I started off by tinting the can of frosting with blue food coloring. I placed the blue frosting inside the piping bag with a start tip.  Generously covering my cupcake with blue swirls of frosting to symbolize the fur of Cookie Monster (Tack 124). Furthermore, Karen Tack emphasized the importance of making the frosting messy by saying, “To really get the fur of Cookie Monster, swirl the frosting in no particular order, get it everywhere to make it more realistic” (Tack 124). Using her technique, I grabbed the piping bag and squeezed it while moving my hand all over the cupcake without going in any pattern. Then, using a knife I cut a line at the bottom of the cupcake to create the mouth of Cookie Monster. I placed a cookie in the month of Cookie Monster because, duh, Cookie Monster loves cookies. Finally, I placed two edible eyes at the top of the cupcake, and honestly after placing on the eyes, my Cookie Monster became an old man. It didn’t really look like Cookie Monster anymore but a weird man. However, my friend said that it was cute and adorable.


That’s it! It is honestly so simple and doable! Overall, I had a really great time not only making the cupcakes but also eating them. They turned out way better than I expected. I brought these cupcakes over to my little cousins and they absolutely loved them! I will surely make these cupcakes again in the future! I am so shocked that I was able to make Cookie Monster, this has been a great achievement.


Question: Who's your favorite character from sesame street, and who would you like to try to bake on a cupcake?


 Richardson, Alan, and Karen Tack. Hello, Cupcake! Boston: Houghton Mifflin, 2008. Print.         

Pastel Cupcakes

Today, I will be making pastel cupcakes. If you’re in a rush and need something fast and sweet to devour then these cupcakes are perfect. The ingredients you will be needing are:

·        6 cupcakes Paper liners
·        Regular Cupcakes baking pan: 2 1/2 x 1 1/4 inches
·        ½ cup on whole milk
·        Piping bag and tips
·        3 cans of 16 oz. Container of vanilla Frosting
·        A whisk
·        An Oven
·        11.5 oz. of Cake Mix
·        1 egg
·        Red, blue, green, and yellow food coloring
·        1/3 cup of Vegetable oil

      
First, I made the batter and placed it in the oven. After making the cupcakes, I divided the frosting into 4 small microwaveable bowls. Karen Tack, author of Hello, Cupcakes, said to buy store-bought frosting to produce a firm, shiny, glistening, and smooth cupcake (Tack 138). I tinted each bowl a different pastel color with food coloring. Karen Tack explains the importance of covering up the frosting by saying, “Cover the frosting with plastic wrap until ready to use to prevent them from drying out” (Tack 139). Her techniques helped me significantly, last time when I was waiting for my cupcakes to cook, I tinted my frosting; However, I left it out without any cover and my frosting hardened and I was unable use it.


I microwaved each bowl for 10 seconds and stirred it until it became the consistency of light whipped cream or Elmer’s glue. If it’s too thick, stir and microwave for 10 more seconds (Tack 139). Quickly, I held the cupcake by its bottom and dipped it into the melted frosting and lifted the cupcake and allowed the excess frosting to drip off. I popped all the bubbles on the cupcakes and fixed spots that were weird and funny. Afterwards, I waited about 2 minutes for the frosting to harden, and dipped it back into the frosting. The second layer looked way smoother than the first layer. Later, I took a piping bag and filled it with white frosting and applied simple designs on the cupcakes, so it wouldn’t distract the attention away from the pastel frosting.  
Final Product


------->


My friends said they look absolutely adorable and tasted great! 


Question: What color would you use if you were to make these cupcakes?
                  Have you ever tried dipping your cupcake into melted frosting before?

 Richardson, Alan, and Karen Tack. Hello, Cupcake! Boston: Houghton Mifflin, 2008. Print.         


Gotta Catch’em All

Today I will be making Pokémon balls cupcakes. Can you believe that Pokémon has been around for 20 years? As a child my favorite game of all time would be Pokémon.  I grew up with mainly boys in my household, so I played games that my cousins would love to play and I would be so excited to catch Pokémon’s and have competition with them. Today I will be reliving my childhood by making these cute, doable cupcakes. The ingredients you will be needing are:

·        6 cupcakes Paper liners
·        Regular Cupcakes baking pan: 2 1/2 x 1 1/4 inches
·        ½ cup on whole milk
·        Piping bag with tips
·        1 can of 16 oz. Container of vanilla Frosting
·        A whisk
·        An Oven
·        11.5 oz. of Cake Mix
·        1 egg
·        Red food coloring
·        1/3 cup of Vegetable oil


Like Before, I made the batter and placed it in the oven. After 25 minutes I took the cupcakes out and started the decoration. Karen Tack emphasized the importance of having the right texture of frosting by saying, “Make sure your frosting is at room temperature; it will have a better texture and will be easier to handle, and always stir the frosting before using it” (Tack 10). I took her advice and placed the frosting on the kitchen table for a day, and stirred it well before using it. First, I took half of the frosting in the can and made it red with red food coloring and let the half remain white. I took the red frosting and spread it on half of the cupcakes, and i did the exact same thing with the white frosting. I removed any excess frosting and smoothed the top (Tack 10). 

Then, I put chocolate frosting inside a piping bag with a small hole tip. Where the red frosting and the white frosting meets, I put a line in the middle and a circle in the middle of the line to create the Poké ball design. It might look sloppy and messy at first, but everything will eventually come into place.Then, I get another piping bag but this time I have white vanilla frosting inside. With the same small hole tip, I fill the circle in the middle of the line with white frosting to imitate the poke ball design.


--------------------->


Overall, they look so adorable even if it’s a little messy! My friends said it was tasty and the design was beautiful! I really enjoyed making these cupcakes and will surely make it again in the future!


Question: Did you play Pokemon when you were young? If so, what Pokemon was your favorite? 
Will you ever try to bake these cupcakes?

 Richardson, Alan, and Karen Tack. Hello, Cupcake! Boston: Houghton Mifflin, 2008. Print.         

White Chocolate Chip Cookies!

For my last blog post, i decided to do another cookie recipe since i started off my blog with a cookie recipe, i wanted to end it with a cookie recipe! The recipe is quite similar to the original one i did in my first blog post but this is a little tweaked. Also a relative of mines birthday is coming up and they love white chocolate chips so what better excuse to make these amazing cookies from scratch! According to the book, "This cookie recipe will make a total of three dozen cookies when using two tablespoons for each cookie" (Pansino 32).

The ingredients you will need are:
- 2 1/2 cups all-purpose flour 
- 2 teaspoon baking soda 
- 1 teaspoon salt 
- 2 sticks (8 ounces) salted butter, at room temperature 
- 3/4 cup granulated sugar 
- 3/4 firmly packed light brown sugar 
- 1 teaspoon vanilla extract
- 2 large eggs 
- 12 ounces white chocolate chips 

Directions:
1. The first thing you do is preheat the oven to 375 degrees Fahrenheit and in a medium bowl, mix together the flour, baking soda, and salt.
2. In a large bowl, cream together the butter, granulated sugar, brown sugar, and vanilla. Next you add the eggs, one at a time and scrape the sides of the bowl if needed.
3. After the two mixtures are all mixed, "beat the flower mixture in parts of three until combined" (Pansino 32). This step i think is such a important step because if you dont put the flour into three parts, it would get very messy and i know that no one want to clean up a mess of flour so i made sure i divided them into three parts and luckily, i didn't make a mess!
4. Next you would fold in the white chocolate chips and place two tablespoon of dough per cookie onto the baking sheet. This part i kind of changed up a bit because i am making these for a specific occasion and needed different sizes but the recipe says 2 tablespoons of dough per cookie.
5. After the oven is done pre-heating, put the cookies into the oven for 7 to 9 minutes and after they are done, take them out to cool completely. I decided to set my timer for 8 minutes because it is in the middle of seven and nine. In the book, the author specifically says when cooling the cookies, not to place them in the freezer but let them air cool (Pansino 21). When you place the cookies in the freezer, the cookies start to crack so i made sure that i didn't put them int the freezer and it took for me about 30 minutes for all the cookies to cool and finally be complete and ready to eat! If you have a wire rack, that would be a better place to place the cookies overnight and wake up to them fully ready to be gobbled down!

Final Presentation:
The total number of cookies that i got from this recipe was 39 cookies! Luckily i have people to eat them so they just dont lay around my house. I felt like this recipe with the white chocolate chips were okay but not the best. The brown sugar didn't compliment the white chocolate chips as well as they could've but they still tasted amazing. I feel like the white chocolate chips would be good with maybe a sugar cookie recipe rather than one that needed regular chocolate chips. Other than that, it tasted amazing and the white chocolate tasted amazing and overall, this wasn't my best recipe, but it was a good one to try out. Either way, THE OUTCOME WAS DELICIOUS! 
Question: What is your least favorite type of cookie and why?

Citation: Pansino, Rosanna. The Nerdy Nummies Cookbook: Sweet Treats for the Geek in All of Us. New York: Atria, 2015. Print.

Monday, January 30, 2017

Super easy fruit dip

This fruit dip is extremely easy! I'm pretty sure anyone could make this dip! This dip is great when you're having a party and it's great finger food for a football Sunday! (That's why I made this!).

Ingredients: 
- 1 8 ounce package of cream cheese 
- 1 8 ounce jar of marshmallow puff

"Blend the ingredients together" (Pg. 40) I decided not to do this because I learned that if you blend the cream cheese by itself first then there will be less bumps in your dip. 

The first step is to whip your cream cheese by itself first until it looks light and fluffy. After it looks completely blended then you can add in the marshmallow puff and beat those together until everything looks blended completely. 
My favorite way to eat this dip is on strawberries it is so good! Thank you for tuning into my blog! Hope you have a great morning, afternoon or evening! 

Now tell me, what is your favorite fruit and would you try this dip on them?
   

Cheesecake bars

Hello Fellow Bloggers!
Today's treat are yummy Oreo cheesecake bars! These bars are super yummy, but be warned these are really sweet so one little piece could be enough! In the book it said "Press cookie dough into a 8 x 11 glass pan" (Pg. 32). But I didn't want to put it in that small of a pan because I didn't want the cheesecake bars to be too thick. 
Ingredients: 
- 1 log refrigerated chocolate chip cookie dough 
- 20 Oreo's, plus more for crushed topping 
- 2 8-oz bar cream cheese, softened 
- 1/2 cup sugar
- 2 large eggs
- pinch of salt 
- warm caramel for drizzling 
The first step is to line the baking dish with either parchment paper or aluminum foil and then press the log of cookie dough into the pan covering the bottom of the pan. I decided to use aluminum foil just because I ran out of parchment paper. 

 The next step is to put Oreo cookies on top of the cookie dough layer and just cover all the cookie dough, you may have to break some in half to fit them correctly. 

The next step is to make the cream cheese batter, now I kind of failed during this step but not completely, my mixture came out really bumpy this happened because I didn't whip the cream cheese before adding the other ingredients. But the bumpiness did not affect the outcome of the bars at all they still were good! After you make the cheesecake batter pour it on top of the Oreo's and cookie dough. 

The next step is to crush up some Oreo's and then shake them over the cheesecake batter and then put the cheesecake bars into the oven at 325 degrees for 40 minuets.
 The last couple of steps are super easy! After the bars come out of the oven place them into the fridge to cool for a few hours. Once they are completely cooled then take the bars out of the pan by using the aluminum foil and lifting them out of the pan and onto a cutting board. Then you have to take the foil of the bars and then heat up the caramel sauce for a few seconds in the microwave and then drizzle the caramel over the bars. 
Thank you for reading my blog! Hope you're having a great night, morning or afternoon and tune in next time. 
Now tell me do you enjoy cheesecake if so what topping would you use?