I have successfully made something for every time of the day but what do you eat afterwards. Introducing dessert!!! I found this delightful pudding that just looked so scrumptious that I had to try it. First, I had to rinse the tapioca for around 20 seconds in a strainer.
I set that tapioca aside and began to boil the coconut water in a small saucepan.
I then poured the tapioca in the coconut water and cooked that for around 11 minutes. I had to make sure that the pearls did not stick to the pan. I cooked them until the liquid thickened and the pearls were almost translucent.Next I cut half of the a vanilla bean lengthwise and scraped out all the seeds. I added half of the seeds and the scraped out pod. I also added the coconut milk, honey, and just a pinch of salt.
I stirred it until all the seed clumps were gone and stirred for 5 to 7 minutes. I then took the pot of the heat and let it cool to room temperature. Then I put it into a container and put it in the fridge to cool overnight.
While that was cooling I started on the pineapple garnish to put on top. I put a can of pineapple into a small sauce pan with all of its natural juices.
Then I put the other half of the vanilla bean pod and the extra seeds in with the pineapple.
I turned on the heat and waited for it to boil. Once it started to bubble I let it simmer for 15 minutes until it had boiled down to half.
Then I removed the vanilla bean pod. I added a little bit of honey and added a pinch of salt. I took the pot of the heat and used a hand blender to puree it until it was like apple sauce.
I then put the pineapple mixture in a container and put it in the freezer overnight.
The next day I put the pudding into some bowls and scarped some puree on top.
My little siblings loved it and it was absolutely delicious.
I cant wait to do this again. What fruit should I use next time instead of pineapple for a new twist?
Showing posts with label Dessert. Show all posts
Friday, January 26, 2018
Sago Coconut milk dessert with mini tapioca
Sago Coconut milk is a traditional Chinese dessert that is made with a boiling process of the mini tapiocas, milk, and coconut cream together. This delicacy is super silky to taste and has a fresh and creamy smell of coconut. With the chewy tapioca, it makes the perfect pair. This dessert also comes in a variety of flavors. For example you can add mango, taro, red beans and much more to customize it. Today I will be teaching you guys how to make a coconut flavored one.
Ingredients: 1 can of coconut cream, 6 cups of milk, 1 cup of mini tapioca, and 1/2 cup of sugar
Steps: First boil the tapiocas until they turn clear and rinse them under cold water and strain. Let it cool, then in a pot, bring your milk, coconut cream and sugar to a simmer, making sure that the heat is low. Once everything is combined, add the tapiocas and mix well.
When straining any ingredients, use a strainer or sift to ensure all the water is removed (Paul 227). This is important in the process of making anything because it ensures that there are no excess liquid in your ingredients. During the process of boiling, make sure to choose a pot with a thick bottom. "Choose a heavy-based pot, usually for making sauces or liquids" (Paul 214). I learned that this is important because a thin bottom can lead to burning to the substance and can ruin the taste and appearance of you end product.
This dessert can be served cold or hot. Also they can be accessorized with different toppings such as beans, ice cream, mochi, and also whipped cream. To decorate mines, I sliced up some strawberries and placed it on top to add some color.
What are your guys' favorite traditional dessert?
Wednesday, December 28, 2016
Christmas Tree Cupcakes
Christmas and cupcakes are two
of my favorite things, so what could be better than combining them in these
delicious Christmas trees cupcakes? Karen Tack, author of Hello, Cupcakes said, "This Christmas Tree cupcake may appear a little daunting, but they are actually simple to make" (Tack 150). Truth to be told, it was way harder than I expected. However, these Christmas tree cupcakes are one of the best choices to contribute to Christmas parties. The
cupcakes are adorable and sweet; they will certainly not leave you
disappointed.
Material:
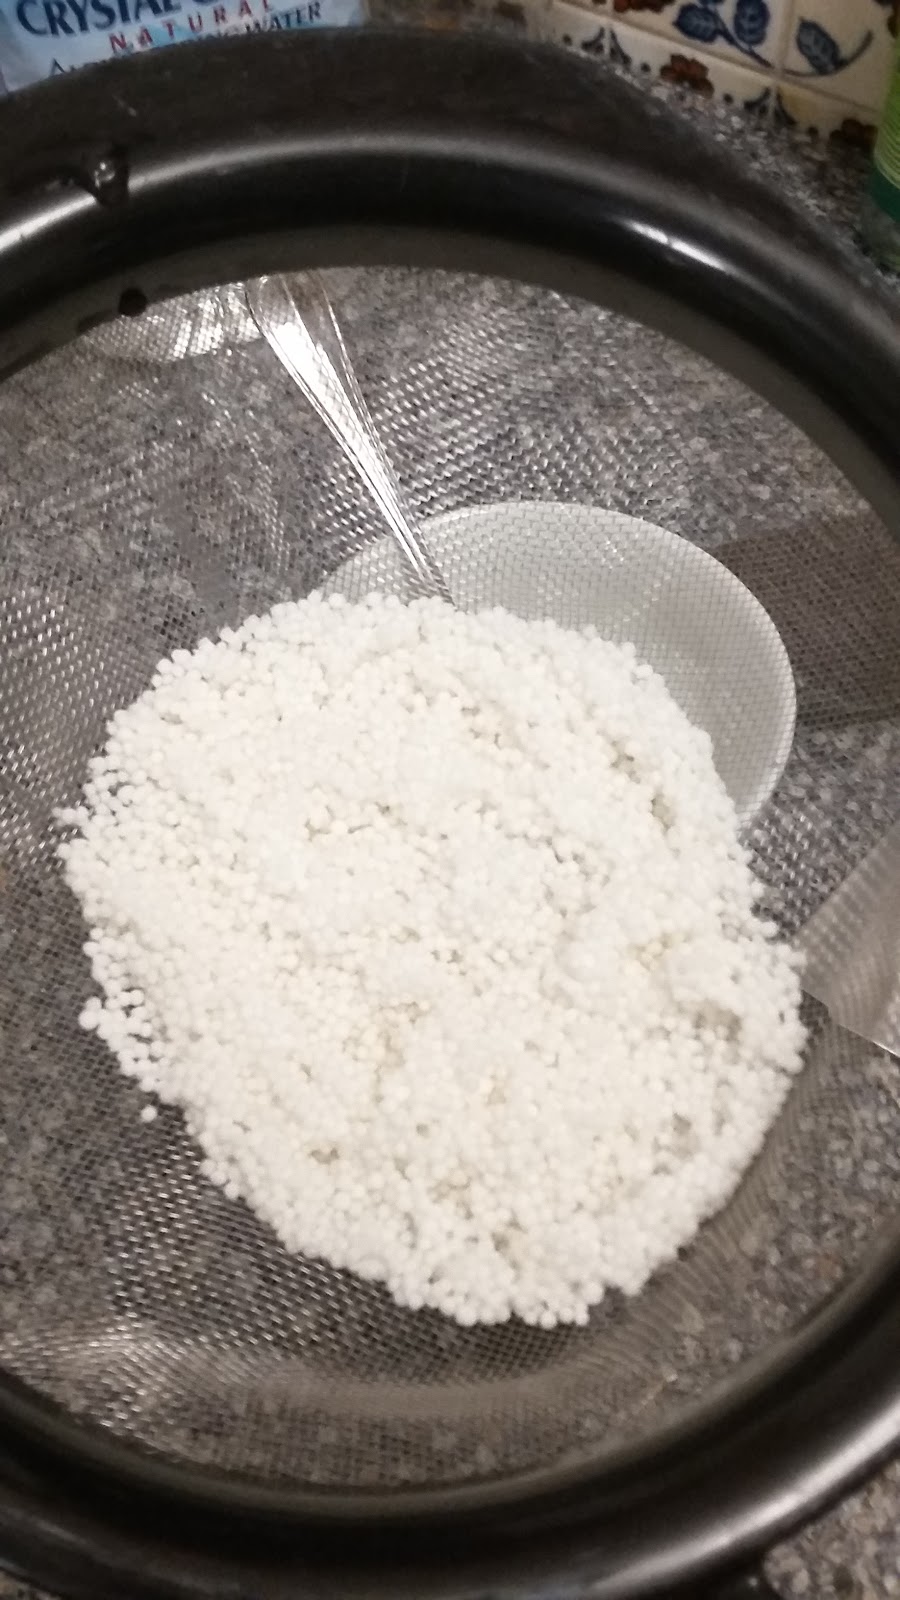
§ 11.5 oz. of Cake mix
§ 4 egg whites
§ 1/3 cup of oil
§ 1 cup milk
§ Green Food coloring
§ Large Mixing bowl.
§ 7 cupcakes paper
liner
§ Sprinkles, Stars
§ Store bought frosting
Steps:
Like before, I preheated the
oven to 350 degrees. I mixed 11.5 grams of cake mix. I added ½ cup of milk, one
egg, 1/3 cup of oil and cake mix, I mixed it until it became firm. Then, I placed the batter into
the paper liners and placed in the oven, I waited around 25-30 minutes and took
it out of the oven to let it cool.
After, I tinted ½ cups of the
vanilla frosting green and let the other half remain white. I distributed the
white frosting on top of the 7 cupcakes to symbolize the snow. The frosting didn’t have to be pretty but quick and
simple, it is just used to enhance the characteristics of the Christmas tree. I applied the store bought white frosting onto the
surface of the cupcake, this way, it produces the cupcakes to look more
sophisticated and cheerful when the Christmas tree is on top (Tack 152). After
applying this technique, it definitely enhanced the
characteristics and colors of the Christmas trees.
Lastly, Karen Tack, author of Hello, Cupcakes, explained the techniques on how to get the perfect Christmas
trees. She said, “ Move the piping
bag in a circle around the outer edges and work your way to the center of the
cupcake, releasing pressure gently when you reach the center to leave a nice
frosting peak” (Tack 156). Her instructions seemed easy and doable; however, it
wasn’t. I had a really hard time pressing the piping bag and moving it in a motion to form
the Christmas trees. I think it was mostly the fault of me not buying the right
bag and also how inexperienced I was. Continuing on with the procedure, I added
a star to the top and little tiny dots to represent the ornaments. The sprinkles once again made the cupcakes look more pleasing
and pleasant than it actually was.
I failed... |
My only good one. |
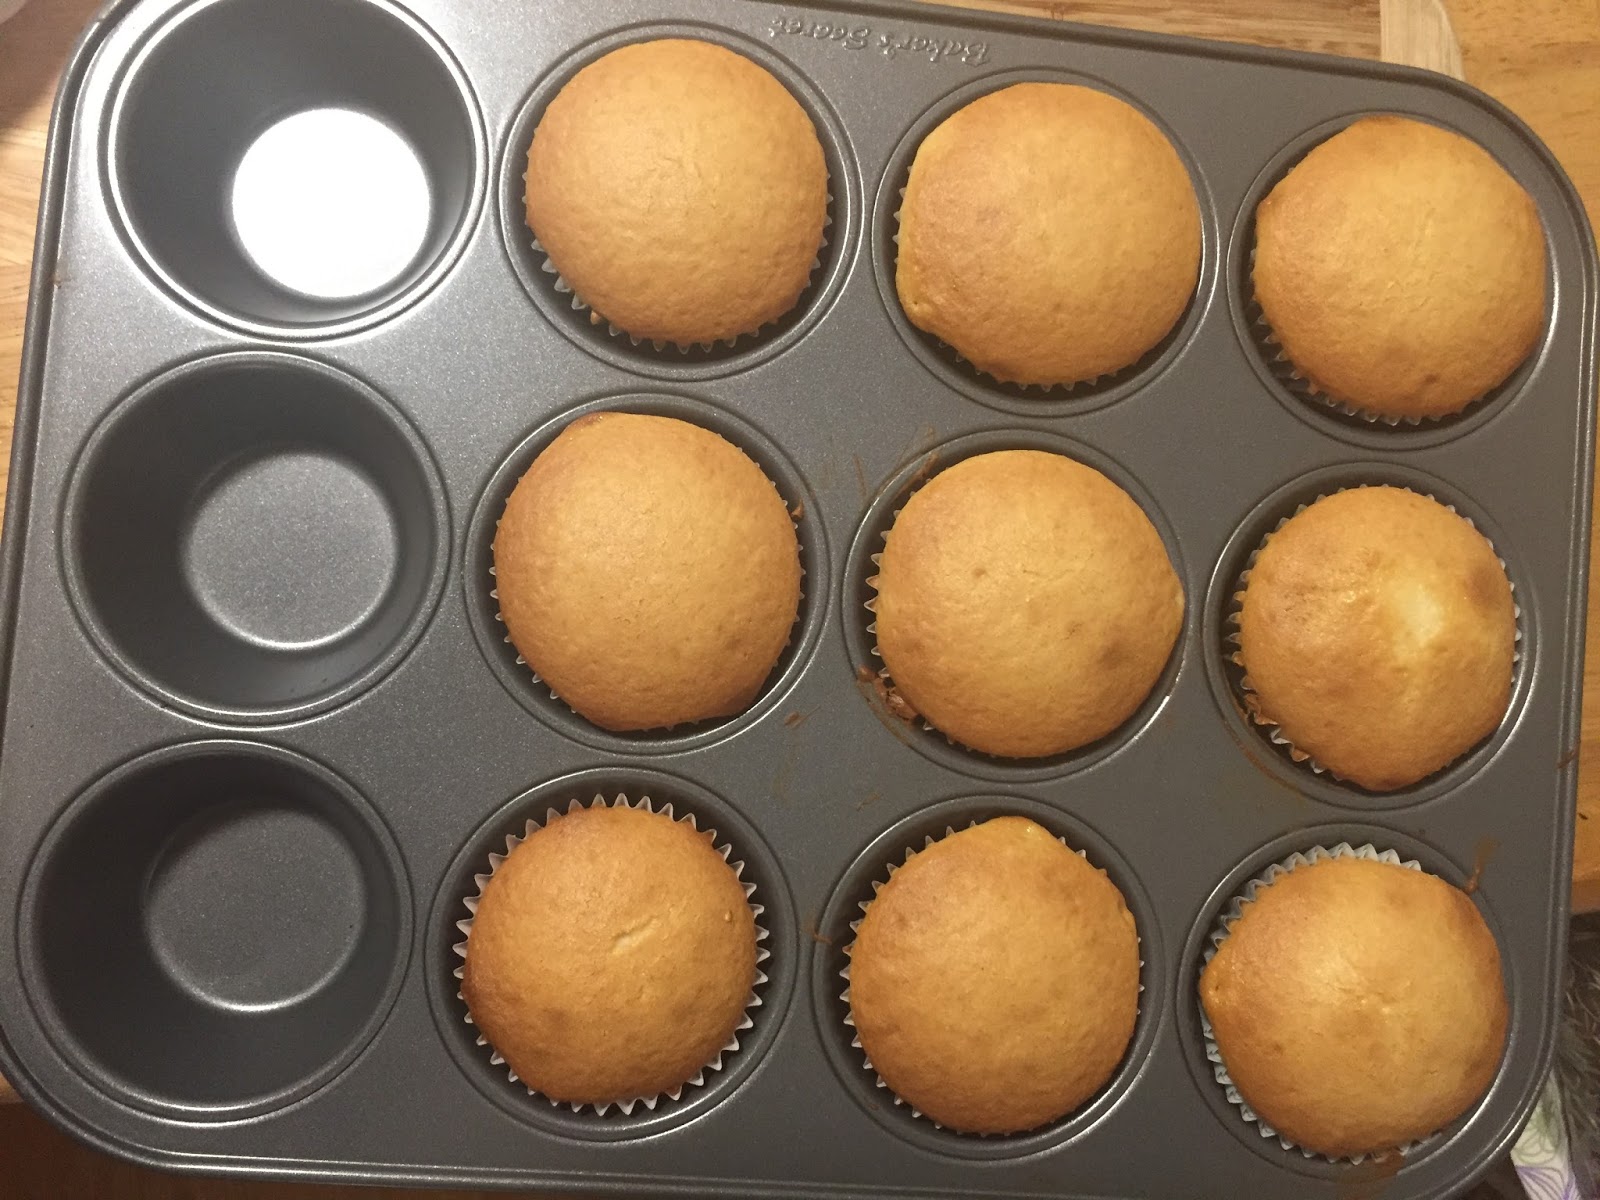
Lop sided, ugly, malformed are
the characteristics of my Christmas tree cupcakes. This experiment was a total
fail, but I still had fun making it. The cupcakes wasnt very pleasant to look at, but it was
still delicious. Out of the 7 cupcakes, I only managed to make the Christmas
trees on four of them. I will continue to practice, and
will definitely be able to get it right next time!
Final Product
Question: Have you ever used a piping bag before? If so, how did it go?
If not, have you ever tried to make Christmas treats for a party or would like to in the future?
Richardson, Alan, and Karen Tack. Hello, Cupcake! Boston: Houghton Mifflin, 2008. Print.
Labels:
Baking,
Christmas Trees,
Cupcakes,
Dang Lam,
Dessert
Monday, December 26, 2016
Honey Vanilla Pound Cake
For my third blog post I decided to make another baked good.
The baked good that I decided to make was a honey vanilla pound cake.
The ingredients include:
- ½ pound unsalted butter
- 1 ¼ cups sugar
- 4 large eggs
- 2 Tbsp. honey
- 2 tsp. vanilla extract
- 2 cups cake flour
- 1 tsp. salt
- ½ tsp. baking powder
The first step is to preheat the oven to 350 degrees, then
grease the bottom of a loaf pan and set it aside.
“In the bowl of an electric mixer fitted with the paddle
attachment, cream the butter and sugar on medium speed for 3 to 4 minutes,
until light” (Garten, 208). I did exactly what Garten had said and I had
achieved the light creamy texture of the butter and sugar combination.
Crack the eggs into a separate bowl. With the mixer on
medium-low speed, add the eggs one at a time also add in the honey and vanilla extract.
Then sift together the flour, salt, and baking powder. With the mixer on low
speed add in the dry ingredients. Once the batter is completely mixed together
then pour the batter into the prepared pan.
Bake the pound cake for 50-60 minutes. You know the pound
cake is ready when you can insert a toothpick in the center of the cake and it
comes out clean (Garten, 208). I baked the pound cake for 50 minutes and then
tried the toothpick method, the toothpick came out with a tiny bit of batter on
it so I baked the cake for 10 more minutes, then I tried the toothpick method
again and it came out clean so I knew the cake was done baking.
After the pound cake is done baking then let the cake cool
for about 15 minutes, then cut into slices and enjoy.
The pound cake was delicious it had just the right amount of
sweetness and a perfect texture with a soft center and a stiffer outside. I highly
recommend this recipe especially to those who don’t like too much sweet in
there baked goods, this is a perfect simple delightful desert.
Do you use the toothpick method when baking? And do you
prefer your baked goods to have a lot of sweetness or only a little bit?
Garten, Ina. Barefoot Contessa Back to the Basics. New York,
Clarkson Potter, 2008. Print.
Labels:
Baking,
Dessert,
Food,
Pound Cake,
Sidhu Josh
Wednesday, November 30, 2016
Brownies
To start off my blog I will be making one of my favorite
baked goods, brownies. The cook book I got had a very easy and simple recipe
for brownies, so I decided to try it out.
- ½ pound unsalted butter
- 4 large eggs
- 2 cups sugar
- 1 cup cocoa powder
- ¾ cup all-purpose flour
- 1 Tbsp. vanilla extract
The first steps are to preheat the oven to 325 degrees, then
butter a pan and set it aside, and melt the sticks of butter for later.
“Beat the eggs and sugar on medium-high speed for 5-10
minutes, until very thick and light yellow” (Garten, 218). When I made my
recipe I did the same thing but when I was done the color I had was a darker
yellow not a light yellow like the Garten said, I think this was because I used
organic sugar which has a brown color to it instead of pure white regular
sugar.
When the egg and sugar mixture is ready, lower the speed to
low and add the vanilla extract, cocoa powder, and flour. Mix until everything is
combined (Garten, 218). I did just as the instruction said and added the vanilla
extract, cocoa powder, and flour and mixed on low speed. I mixed until
everything was properly combined and I couldn’t see the flour or cocoa powder
anymore.
Then
add the melted butter to the mixture and combine on low speed. When I usually
bake brownies I add chocolate chips for extra flavor, since this recipe didn’t
say to add them I thought that I would add them to this recipe to make the
brownies more delicious. Lastly pour the batter into the pan and put it into
the oven.
The
brownies turned out great once they were done baking, I was right about the
chocolate chips because they really did add a wonderful chocolate boost to the
brownies. If you try this great simple brownie recipe I suggest you add the
chocolate chips for they add a delicious chocolate flavor that really enhances the taste.
What’s your favorite baked good? And do you have any special
ingredients you like to add to it?
Garten, Ina. Barefoot Contessa Back to the Basics.
New York, Clarkson Potter, 2008. Print.
Labels:
Baking,
Brownies,
Dessert,
Food,
Sidhu Josh
Hello, Cupcake!
Today, I will be sharing with
you my easy and simple techniques for baking cupcakes. Out of all my hobbies, I
would have to say that baking would be at the top of my list. The days where I
want to be productive, instead of binging on Netflix shows, I would choose to
bake. Baking is tremendously pleasurable and it helps to get my mind off of
unwanted stress. You are probably wondering why I chose cupcakes out of the
huge selection of baked sweets. Well, cupcakes are my favorite dessert. If you
take me to a party where there are cupcakes, I will surely be the first in
line. The sweet, creamy frosting and the delicious, moist cake partner up to
make cupcakes a popular favorite among people around the world.
Ingredients:
·
7
cupcakes Paper liners
·
Regular
Cupcakes baking pan: 2 1/2 x 1 1/4 inches
·
½
cup on whole milk
·
Large
Mixing Bowl
·
16
oz. Container of vanilla Frosting
·
An
Oven
·
2
different cans of sprinkles
· 11.5
oz. of Cake Mix
·
1
egg
·
Red food coloring
·
1/3 cup of Vegetable oil
Steps:
The first step in making the
cupcakes is to preheat the oven to 350 degrees. Karen Tack, author of Hello,
Cupcakes, explains the importance of preheating an oven by saying, “Food also
cooks faster in a preheated oven – you've got the right temperature from the
get-go and your dish can start cooking immediately and properly” (Tack 3).
After listening to her advice, I applied this to my procedure and it worked
very efficiently.
After, I lined 8 cupcake cups
with paper liners. I measured out 11.5 grams of cake mix. I added ½ cup of
milk, one egg, 1/3 cup of oil and cake mix into the mixing bowl. I mixed until
the batter became firm. Then, I poured the batter into the cupcake cups with
the paper liner, and placed it in the preheated oven. After 25 minutes, i took
out the golden brown cupcakes from the oven. Making the batter made my kitchen
and floor very messy. The batter got all over my kitchen floor, on the counter,
my shirt and hands. Even though it got really chaotic, I had an enjoyable time
making the batter.
I waited 25 minutes until
the cupcakes had fully cooled down. In the book Hello, Cupcake! Karen Tack emphasized
the importance of waiting for the cupcakes to cool down fully by saying, "
before putting on the frosting wait for it to cool down, because we do not want
the frosting to melt" (Tack 2). I applied this tip to my procedure and my
frosting stayed sturdy. while waiting for the cupcakes to cool, I tinted the
store bought vanilla frosting pink with red food coloring. Store bought
frosting does well to tinting, making it simple to create vibrant colors (Tack
1). When I applied the method, I was very satisfied with the gorgeous pink
color that I received. Don’t be a klutz like me and eat almost half of the
frosting while I was waiting. I suggest that after you are done tinting the
frosting, STEP AWAY FROM THE FROSTING.
Final Product |
Overall, I was really satisfied
with the end result. I felt very proud of myself for making it alone. I really
enjoyed getting messy and baking my heart out. My friends really enjoyed the
cupcakes and thought they were good. They were utterly shocked that I took the
time to actually bake cupcakes, since I am pretty lazy. When you’ve got a
reason to celebrate, bring out the wow in the occasion with cupcakes. Baby
showers, family reunions, summer garden parties, even weddings - are all great
opportunities to show off your cupcakes prowess. Happy baking!
Question: Have
you tried baking cupcakes before, if you did, how was the experience? Also, what is your favorite
frosting color?
Richardson, Alan, and Karen Tack. Hello, Cupcake! Boston: Houghton Mifflin, 2008. Print.
Wednesday, December 30, 2015
Delicious Chocolate Souffle
Making a healthy dessert seems like an impossible task. But it's not as difficult as you might think. A decadent dessert is always nice to have in a healthy diet. "Chocolate souffle can be a part of your diet if you prepare it following this recipe" (Vine 32). This dessert is yummy, light, and has an airy taste. In addition, all the ingredients listed are clean and healthy. "Cooking clean starts with choosing clean ingredients, the ones that come from safe sources and are healthy and chemical free" (Vine 10). Choosing clean ingredients is the first step to eating healthy. After eating this dessert, you won't even notice it's healthy!
Ingredients:
1/4 cup natural cocoa powder
2 tablespoons whole wheat flour
1/2 cup low fat milk
1/2 cup honey
4 egg whites
1 teaspoon lemon juice
I first whipped the egg whites with the lemon juice until they were fluffy. From my experience with making this dessert, I think I should have whipped the egg whites a little more.
Then I added in the honey and mixed it in. Another bonus in this dessert is that you are adding honey not sugar! So no processed ingredients.
Lastly, I folded in the cocoa powder, flour, and the milk. Then I equally divided the mixture into 4 ramekins and baked the souffles.
This was the final result:

In conclusion, the souffles didn't turn out exactly how they should have, but still tasted delicious. The souffles had cracks in them, which they shouldn't have. Other than that, my family and I really enjoyed these healthy little treats.
How do you guys create desserts that are healthy, yet delicious?
Vine, Jonathan. Clean Food Diet: 50 Best Recipes. N.p.: n.p., n.d. Print.
Ingredients:
1/4 cup natural cocoa powder
2 tablespoons whole wheat flour
1/2 cup low fat milk
1/2 cup honey
4 egg whites
1 teaspoon lemon juice
I first whipped the egg whites with the lemon juice until they were fluffy. From my experience with making this dessert, I think I should have whipped the egg whites a little more.
Then I added in the honey and mixed it in. Another bonus in this dessert is that you are adding honey not sugar! So no processed ingredients.
Lastly, I folded in the cocoa powder, flour, and the milk. Then I equally divided the mixture into 4 ramekins and baked the souffles.
This was the final result:
In conclusion, the souffles didn't turn out exactly how they should have, but still tasted delicious. The souffles had cracks in them, which they shouldn't have. Other than that, my family and I really enjoyed these healthy little treats.
How do you guys create desserts that are healthy, yet delicious?
Vine, Jonathan. Clean Food Diet: 50 Best Recipes. N.p.: n.p., n.d. Print.
Labels:
Dessert,
Uppal Jasmine
Subscribe to:
Posts (Atom)