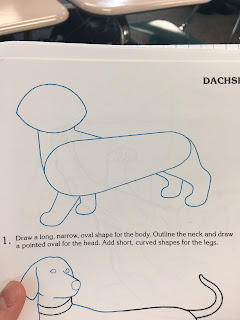
Drawing this second one was still as relaxing. There was no
pressure to be prefect with my drawings and it didn’t take a lot for me to do.
This was something that was calming and fun.
Of course from there I had to refine some lines which wasn’t that hard. You didn’t have to make very many changed to it. The instructions for the next steps were, “Refine the head, neck, and jaw. Add in the shape for the collar, Shape the legs and paws, and outline the tail” (Green 11). The hardest part was making sure everything was in proportion. Sadly, I forgot to take a picture of this step as I was drawing.
From there, it was a lot of erasing
and making sure the legs were the proper shape. Getting the shape correct
wasn’t that easy but after doing one paw, I got it down pretty quick. The
instructions were, “Refine the shape of the body by adding curves to the dog’s
back, chest, legs, and paws. Refine the shape of the ears and the jaw. Add
shapes for the eyes and nose” (Green 11). This step was really simple after
drawing the paws on my last post even though the shape was harder to
accomplish.

The last step in the book was to add tiny details. The book
says, “Detail the area around the eyes, nose, and mouth.” Add contour lines to
the ears, neck, chest, and tummy. Draw in lines indicating the color pattern
and markings on the dogs fur” (Green 11). I was not able to get the details
exactly as I wanted the and that kind of upset me but I was pretty happy at the
final  look. It wasn’t my best drawing but
I can still improve.
 look. It wasn’t my best drawing but
I can still improve.

Final thoughts: This drawing was more difficult in the last
and getting the details right made me a little anxious because I wanted it to
look perfect and that was very hard to accomplish.
Questions: If you were to draw this, what details would you
add/remove to make the dog look better?


0 comments:
Post a Comment